🔔 Heads up!
For the most up-to-date information and instructions on Consent Mode, we recommend referring to our latest guide: Simplified Guide to Google Consent Mode v2.
1. Introduction
This is guide is for everyone who uses Tag Manager and Complianz, and is looking for a simple set-up. To quickly get started, please refer to the GTM container download in the sidebar. This will allow you to import the Complianz triggers and variables directly in your GTM container.
We will start with how to configure Tag Manager in Complianz, and step-by-step instructions on how to configure tags to fire based on the obtained consent in Complianz.
Finally, we also explain how you can manually create these Custom Event triggers in Tag Manager, if you’d rather configure these without using our downloadable GTM container.
2. Enabling Tag Manager in Complianz
Before you start using Tag Manager and Complianz, navigate to Wizard -> Consent -> Statistics, to indicate that your website uses Google Tag Manager. This configuration is needed to use the custom events by Complianz with Tag Manager, so the triggers are fired correctly.
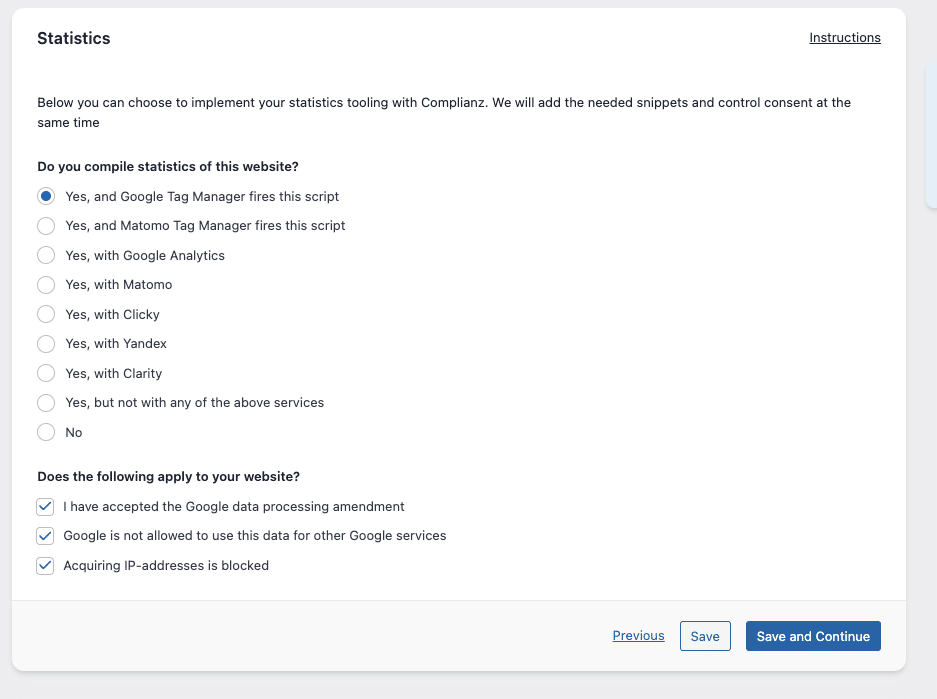
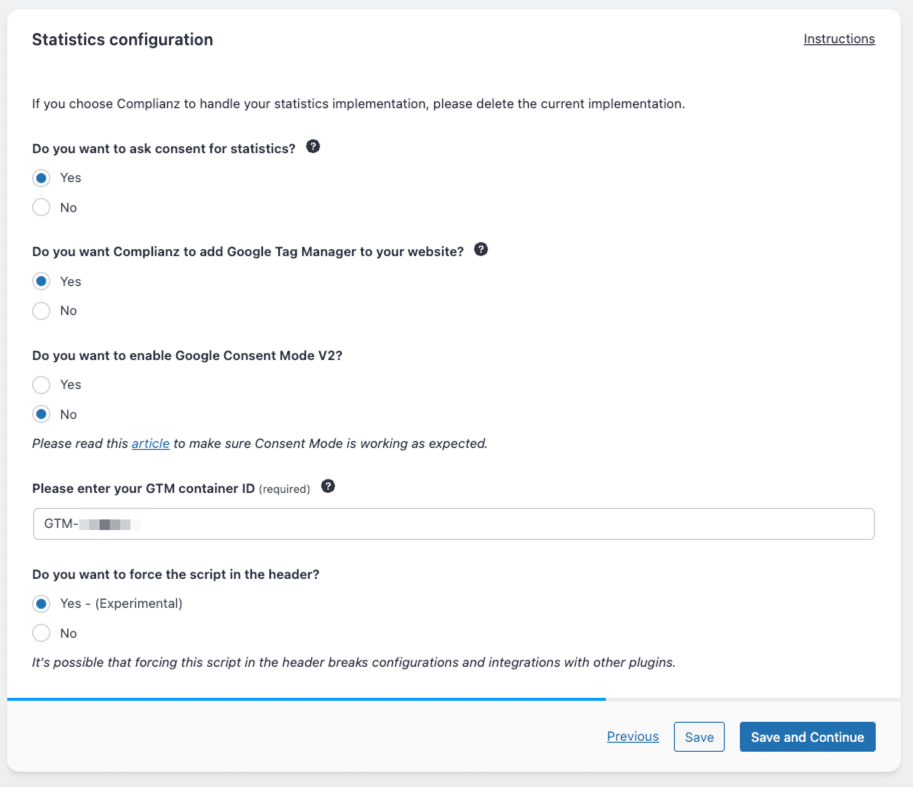
You can insert your Google Tag Manager Container ID on the next page, “Statistics – configuration”.
Note: You might want to enable the option “Do you want to force the script in the header” if you need to explicitly place the GTM code in the head. However, be aware that forcing this script in the header might break configurations and integrations with other plugins.
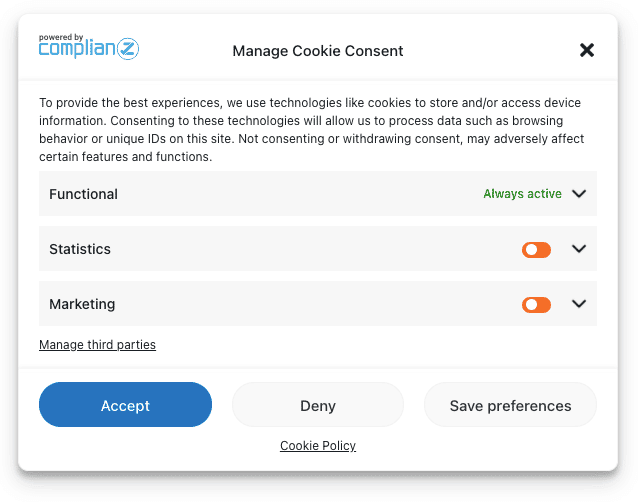
When this is done and you have finished the Wizard, a banner with categories is automatically enabled. The default categories are Functional, Statistics and Marketing.
3. Custom Events in Tag Manager
The above categories are translated to “custom events” that can be used in Tag Manager, to specify when to trigger your tags.
- Functional (default) = cmplz_event_functional
- Preferences (variable) = cmplz_event_preferences
- Statistics (non-default) = cmplz_event_statistics
- Marketing (default) = cmplz_event_marketing.
(Step-by-step) Firing tags based on consent in Tag Manager
Step 1 – Import the Complianz triggers/variables in your Tag Manager container by following these steps (click here).
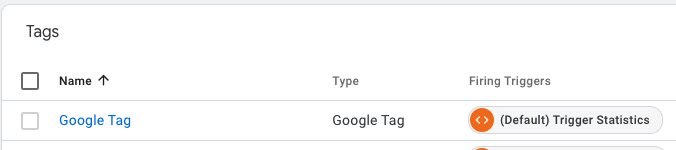
Step 2 – Create a new tag in your Tag Manager container, and select the desired tag type under “Tag Configuration”. In this example, we will create a Google Analytics 4 tag (Tag Configuration -> Google Analytics -> “Google Tag”). 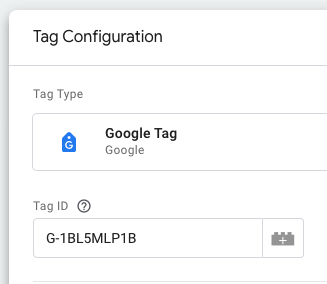
Step 3 – Under Triggering, select one of the Complianz triggers that you previously imported in your GTM container. 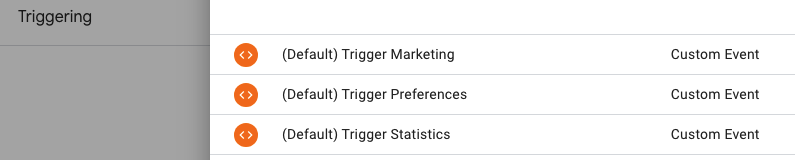
For our Analytics tag, we will use the “Statistics” trigger; as we want it to only load after consent for the Statistics category is received.

The result will be a Google Analytics tag that only fires after “Statistics” consent is obtained in Complianz.
Step 4 – Make sure to “Publish” your container when you’re done making changes.
If you want to know how to create the events manually, and how to configure these events for Opt-out regions or a simple Accept/Dismiss banner, please continue reading.
3.1 How to create a trigger with a custom event
Note: As mentioned above, you can directly import the Complianz events/triggers in your Tag Manager container, so you don’t have to create them manually. Follow these steps to do so: https://complianz.io/importing-tag-manager-container/
Or instead, follow the steps below to manually create the Complianz “custom events” that will serve as the Firing Triggers in Tag Manager:
Rather follow a video? Please scroll down for a video walkthrough.
In your Tag Manager dashboard follow this for every custom event:
- Go to Triggers in the left-hand menu
- In the overview of triggers, select “New”
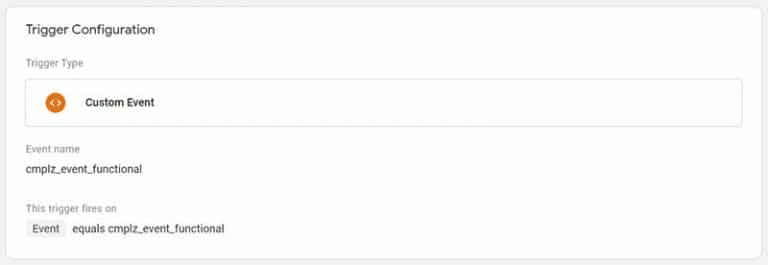
- A slide-in will appear, click in the trigger configuration box for more options
- Under “Other” choose Custom Event
- Fill in the necessary details with the below example event cmplz_event_functional
- Make sure the event equals cmplz_event_functional and save
- Repeat for every custom event relevant to your situation.
This video shows how to create one event, in this example we use cmplz_event_functional
3.2 How to connect a custom event to a tag
Now you have your custom events set-up, which corresponds to your banner categories, it is now time to connect them to your tags, or scripts like Facebook pixels, Google Analytics, etc.
- Go to Tags in the left-hand menu
- Click on the Tag name
- Under Triggering, choose the corresponding custom event.
In the below example, we used cmplz_event_marketing for the Facebook Pixel. We will create the Facebook Pixel, then create the Trigger, and we end with connecting them.
3.3 Specifications for UK, DSGVO & GDPR
The main difference between these guidelines is how statistics are regarded prior to consent.
- For both; if your analytics tool is not configured for the GDPR. you will need to ask consent, and cannot use the triggers “All Pages” or cmplz_event_functional
- If you have configured for the GDPR, you can set analytics prior to consent for GDPR, but not DSGVO, and the UK
- If you have configured for the GDPR, and you are hosting the data yourself e.g., with Matomo, you can use cmplz_event_functional in all regions.
NB. This interpretation is now under scrutiny and closely watched. It might well be all analytical tools will need consent, independent of configuration or hosting, in the near future.
4. Tag Manager for Opt-out regions
Tag Manager for Opt-out regions is not different from the GDPR in many ways. The categories however are not shown on the cookie banner, but on the cookie policy or Do Not Sell My Personal Information page and are only in effect when the user revokes their consent.
By default, all categories are triggered prior to consent. To comply with the CCPA during your configuration, please read configuring Google Analytics for the CCPA.
5. Using the Accept/Deny banner with Tag Manager
If you’re not interested in using a categories banner, or you don’t have a Marketing category, you might want to use the ‘simple’ accept/dismiss banner.
You will need to change the banner under cookie banner settings to Accept/Deny. After that, you can use cmplz_event_functional for Deny, and for Accept you can use cmplz_event_0, and/or cmplz_event_marketing.
6. Anonymizing IP address with Tag Manager
We wrote an article on anonymizing IP addresses with Tag Manager that can be found here. View the below video if you want a quick manual.
7. Verification of your Tag Manager configuration
To verify your installation you can use the preview mode of Tag Manager. Available via the workspace of your dashboard. in the top-right cornr. After publishing your container you can visit your website and a window will be loaded with your configuration. You can now see which tags are fired, based upon your interaction with the cookie banner. A demo can be found on demo.complianz.io.
By default your website (in the EU) will be loaded with functional cookies. It should look like this:
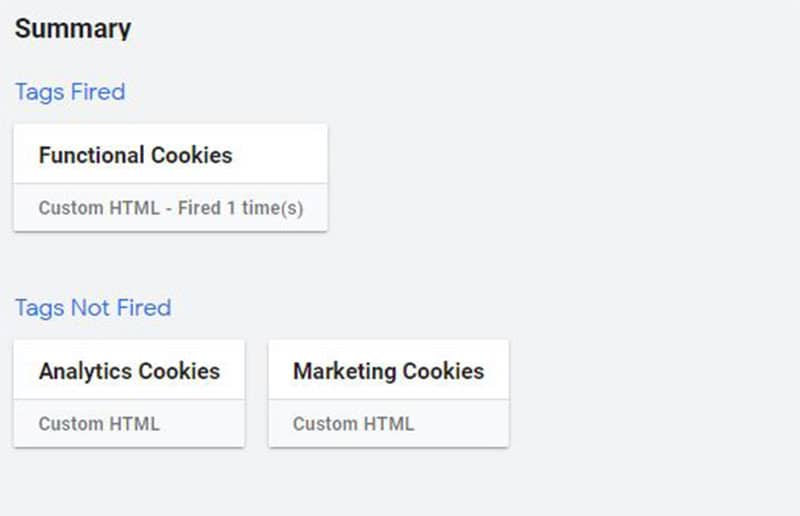
If you select a new category, a new custom event will trigger the relevant tags. Make sure all tags fire correctly.