This guide explains how to configure Google reCAPTCHA in Forminator and manage consent with Complianz. This will result in a form that can only be sent once the Google reCAPTCHA service has been accepted by the visitor.
Configuring Complianz
We need to start by telling Complianz that it should block Google reCAPTCHA before consent is obtained from the visitor.
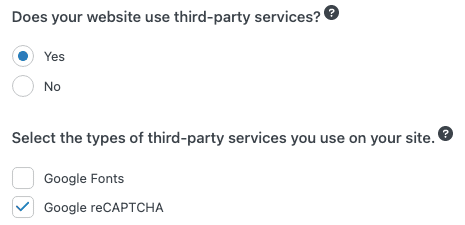
- Navigate to Complianz > Wizard > Consent > Services and answer the question “Does your website use third-party services?” with Yes.
- Under the next question, “Select the types of third-party services that your website uses”, enable the checkbox next to Google reCAPTCHA.
- With the Google reCAPTCHA checkbox enabled, a new question will appear: “Do you want to block reCAPTCHA before consent, and when consent is revoked?” Answer this question with Yes.

- Finish the remaining steps in the Wizard.
Complianz will now block the Google reCAPTCHA script when detected, and releases it after consent is obtained.
Configuring Forminator and reCAPTCHA
Configuring your reCAPTCHA API Key
- To configure your reCAPTCHA API key in Forminator, navigate to Forminator > Settings > CAPTCHA and select the type of reCAPTCHA key that you intend on using (v2/v3). This example uses the v3 ReCaptcha implementation. If you do not have any reCAPTCHA (v2/v3) API keys yet, you can create one here:
https://www.google.com/recaptcha/admin/create - Enter your Site Key and Secret Key, and click Save Settings. If done correctly, the reCAPTCHA preview in Forminator will now display a “Protected by reCAPTCHA” badge.
Creating a form with reCAPTCHA
Verify that the Load form using AJAX setting is disabled in all forms where reCAPTCHA should be blocked
- Start by creating a new form in Forminator (Forminator > Forms)
- Verify that the Load form using AJAX setting is disabled in all forms where reCAPTCHA should be blocked. Under Forminator > Forms, click “Edit” next to the form you wish to edit, and then navigate to Behavior > Rendering to ensure that “Load form using AJAX” has been disabled. Disabling “Load form using AJAX” is necessary for Complianz to correctly block ReCaptcha in Forminator, as when this option is enabled, form elements and ReCaptcha will be loaded in the same JavaScript file, ‘multi.js’, which cannot be blocked without breaking the script.
- Create your form by adding the desired form elements, and finally, insert a “Captcha” element in the form.
- Once inserted, click the Captcha element to adjust it’s settings, and make sure that you set the reCAPTCHA type to the same reCAPTCHA type/version that you had previously added API keys for. As we chose reCAPTCHA v3 for this example, this is also what we need to select here.

- Save/Publish the form and add it to the desired page(s).

The result will be a form that displays a ReCaptcha placeholder prior to consent, and that cannot be submitted without accepting the reCAPTCHA service.

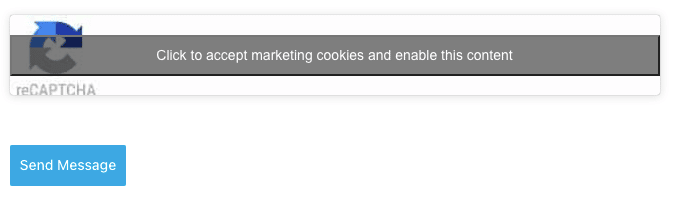
Upon consenting to the ReCaptcha service, the placeholder will disappear and the form can be submitted.
