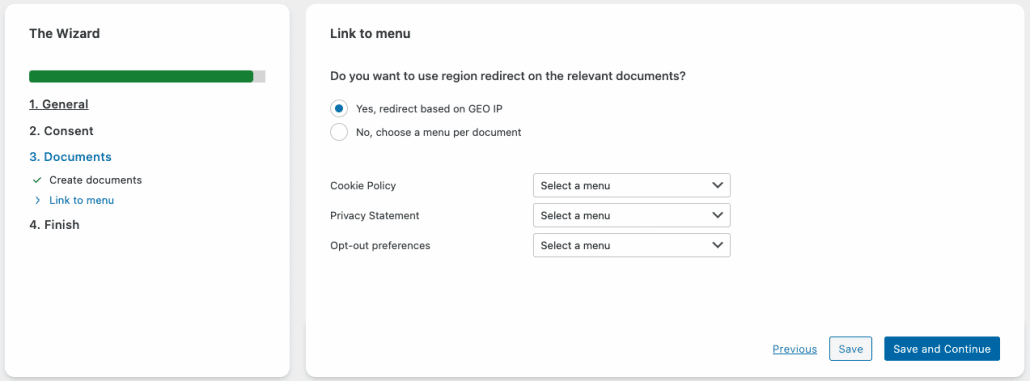
After creating your Legal Documents with Complianz, they can automatically be added to an existing Menu (Complianz > Wizard > Documents > Link to Menu). When selecting “Yes, redirect based on GEO IP,” the menu items will automatically redirect the visitor to the applicable, regional version of the document based on GEO IP.
If your site does not have a menu yet, you can create one first. This article details two methods to create menus in WordPress:
Create a menu in WordPress
- The “Classic” approach is found under Appearance > Menu,
- The “New” Navigation Block in Gutenberg (Block Editor, requires Full Site Editing supported theme)
1. How to Create a Menu in WordPress with Classic Editor
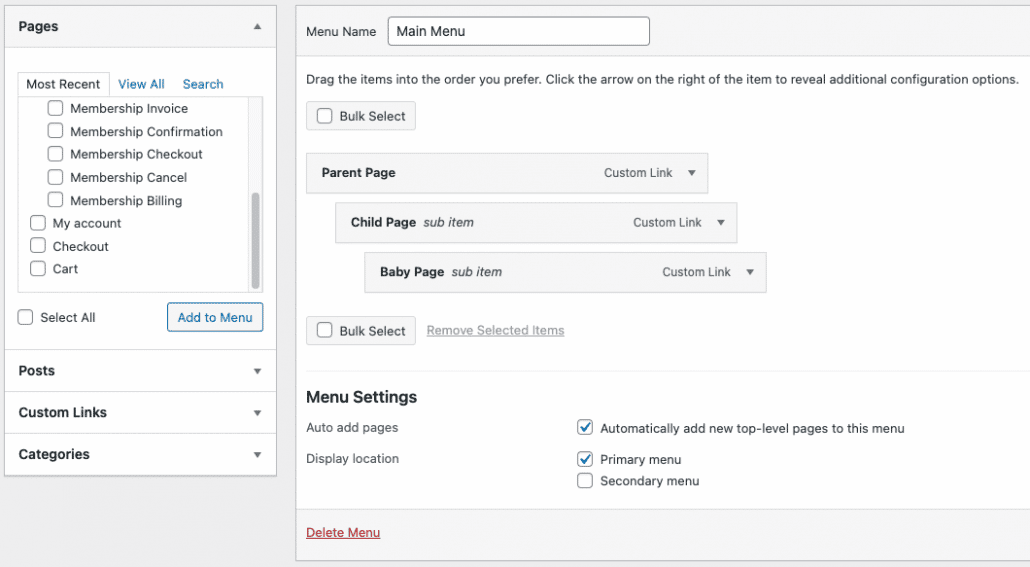
Creating a new WordPress menu
The “Classic” Menu editor can be found under Appearance > Menus in the left-hand WordPress menu. Please note that this option has been replaced with the Site Editor in WordPress 5.9 and upwards.
- Click the “Create a new menu” button and enter a name in the Menu Name field.
- Under Menu Settings > Display Locations, select the locations to display the menus.
- Click the “Create Menu” button to create the Menu.

Adding pages and posts to the WordPress menu
Upon creating your new Menu, you can now add items to it, change their order of appearance and create sub-levels:
- Select Pages, posts, or custom links from the “Add menu items” section, and click the “Add to menu” button to add them to the Menu. Added items will appear in the Menu structure section to the right.
- Drag items up or downwards to change their order of appearance, or create sub-levels by dragging an item to the right or left.
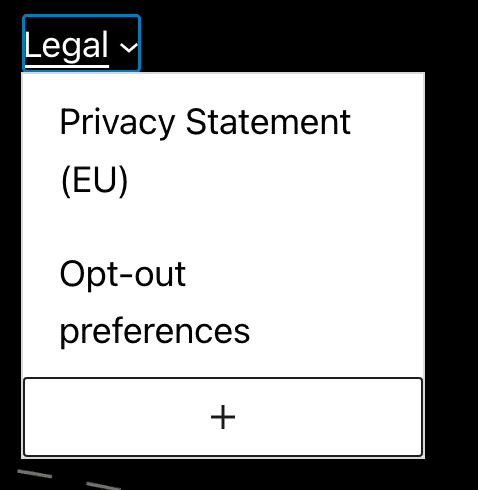
Manually adding the GEO IP redirect to Legal Documents in a Menu
You can let your Menu’s Legal Document items redirect the user to the applicable, regional version based on GEO IP.
- Select “Custom Links” in the Add Menu Items section
- Enter the URL to your Legal Document, and add ?cmplz_region_redirect=true at the end of the URL.

2. How to Create a Menu in WordPress with Gutenberg Editor
If your website uses WordPress 5.9.3 and a block-based theme with Full-Site Editing support (such as Twenty Twenty Two), you can create Menus in the Gutenberg editor with the Navigation Block.
Navigate to Appearance > Editor or the front-end of your site, and click “Edit Site” in the top bar to launch the Gutenberg editor in full-site editing mode.
![]()
We recommend using the “List view” button (highlighted in red below) to display a list of all active blocks in the current view. List view allows you to quickly navigate between blocks and select specific blocks/items within layers of content.

To add your Menu in the Header of your website, click the WordPress icon (left in the above screenshot) and select “Template Parts” in the sidebar menu that appears. Select “Header” to start editing the Header template.
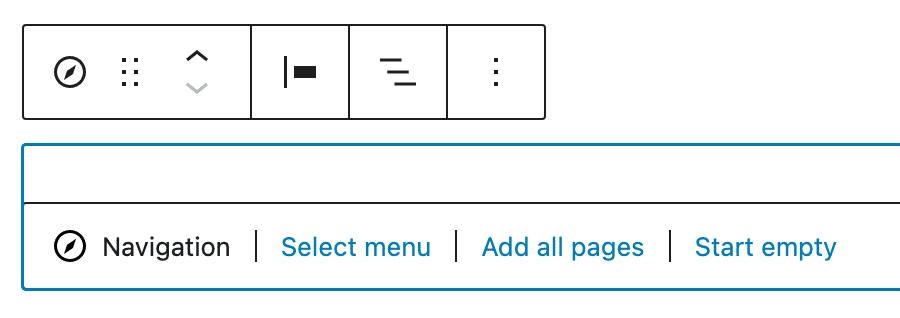
If the selected section does not contain a Navigation block yet, add one by clicking the blue “plus” button in the top left of the Gutenberg editor. Find the “Navigation” block in the list and drag it to the editor.
2.1 Navigation Block: 3 ways to add pages
The Navigation Block has three main ways to add pages: starting with an empty block, selecting an existing menu, or adding all pages.
2.1.1 Creating a new WordPress Menu
Click “Start empty” in the Navigation block to create an empty menu and use the plus icon to add items (pages, posts, links) to the Menu.

2.1.2 Adding Legal Documents to the Menu with GEO IP redirect
- Click the plus icon in the Navigation Block to add a new item to the Menu.
- Enter the URL of your Legal Document and add ?cmplz_region_redirect=true at the end of the URL.
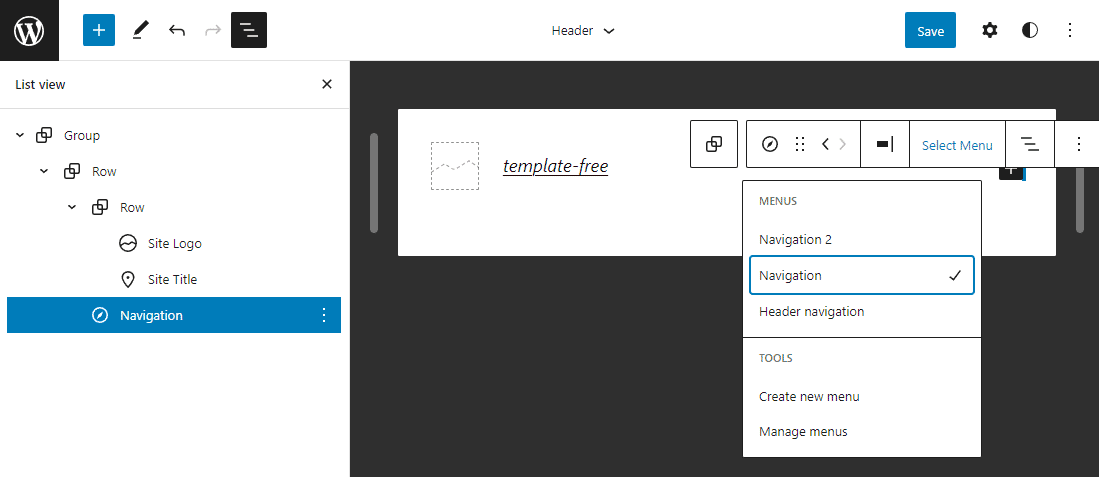
2.2.1 Using an existing Menu
If your site contains previously created menus, such as those created with a previous theme, click “Select Menu” in the Navigation block to select an existing menu from the list.
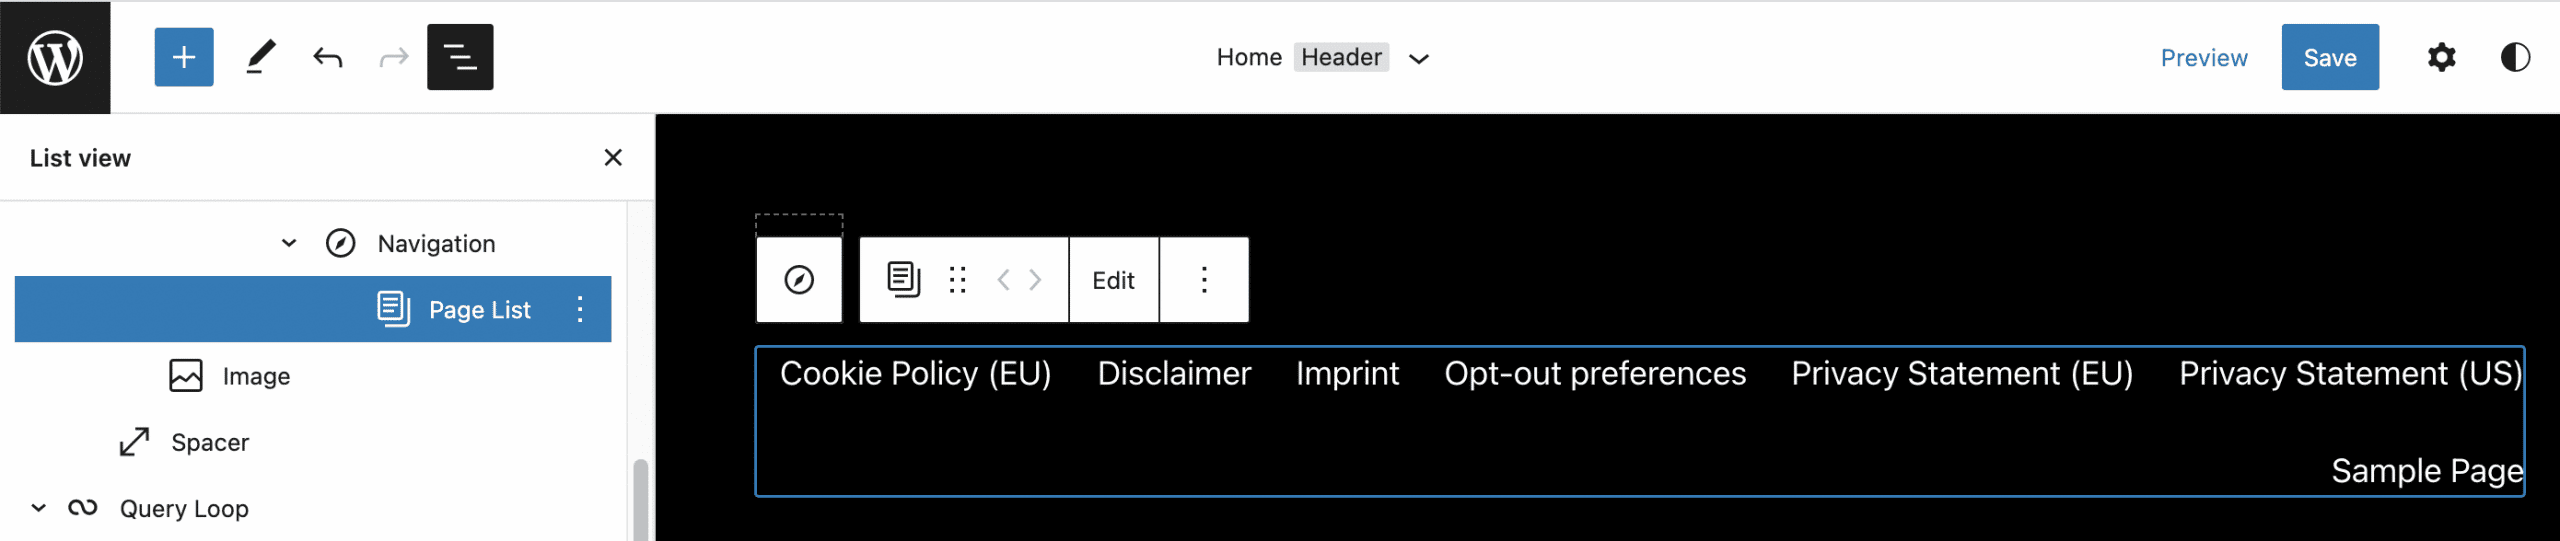
2.3.1 List all pages
This option will add all existing pages of the site to the Menu. If you create new pages, these will be added to the Menu.
2.3.2 Reordering items in a Page List
When the Navigation Block is configured as a “Page List,” you will have to convert the items to links before you can change their order of appearance:
- Select the Page List item and click “Edit.”
- In the Convert to Links window that appears, select “Convert.”
Upon doing so, you can change the order of appearance of items in the Navigation Block

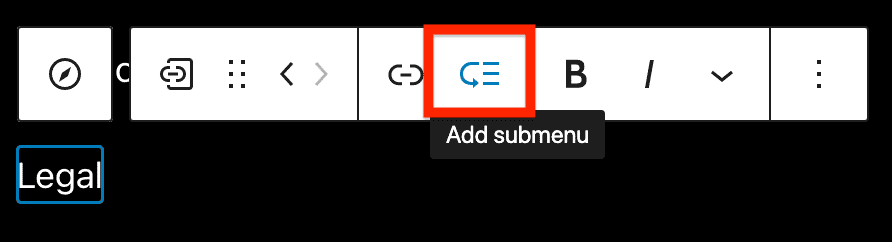
2.4.1 Creating submenu items
Select the item in the Navigation Block where the submenu items should appear, then click the submenu icon in the toolbar (highlighted in red in the screenshot below).
You can now insert submenu items by clicking the plus icon and selecting the desired pages to add.