From 6.0 onward you can create any banner you’d like if you have some HTML & CSS knowledge. You can create amazing banners if you’re an expert! Below we will show you how to override the default Complianz banner with your own creation. You can choose 3 variants on how to add your own touch to Complianz.
- Add some Custom CSS with a WordPress filter
- Remove all default CSS and add your own styling
- Start from scratch, edit your custom HTML template and custom CSS
1. Add some Custom CSS with a WordPress hook
If you want to add some CSS to your current banner, and you rather use a action hook than our custom CSS block in the cookie banner settings, you can use the below snippet:
2. Remove all default CSS and add your own styling
If you want to override all current CSS and start from scratch with your own CSS, you can use the below snippet:
3. Start from scratch, edit your custom HTML template and custom CSS
You can also create the entire banner with HTML and custom CSS. We suggest using the base cookiebanner.php, as shown later, to make sure javascript and the banner can communicate properly.
You will need to do the following:
3.1 Add a filter to override the Cookie Banner
This filter overrides the default cookie banner template with your new HTML template file (we will add the template file in step 3.3 of this article).
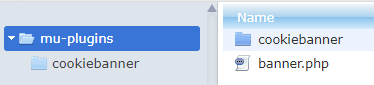
Add the below snippet as a .php file in the /wp-content/mu-plugins/ folder. In this example we’ve called it ‘banner.php’.
After adding the filter, your /mu-plugins/ folder should look like this:
3.2 (Optional) Override the default CSS to add your own, custom CSS
This step is optional, it removes all CSS that Complianz adds by default: so you can add your own CSS instead.
Adjust the .php file that you created in the previous step by adding the below snippet to it, and insert your custom CSS.
3.3 Add your HTML template
We recommend using the below HTML template as the basis of your cookie banner, as some classes might be needed during your configuration. If you’re sure your configuration will not trigger these classes, you can safely remove them. There are however classes dynamically populated that should be maintained to use full functionality, for example:
aria-describedby="cmplz-message-{id}-{consent_type}
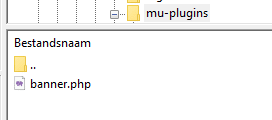
Create a new folder called cookiebanner within the mu-plugins folder, and upload the below template as cookiebanner.php.

You can find the Cookie Banner template here:
Your mu-plugins folder should now contain the filter from step 3.1 (‘banner.php’, to override the banner) and a cookiebanner folder with your new template (‘cookiebanner.php’).