If you run a Shopify store and want to follow privacy laws like the GDPR, setting up Google Consent Mode is a smart move.
Google Consent Mode tells Google when visitors accept or deny cookie tracking. This way, Google tools like Analytics and Ads adjust their behavior based on user consent. It means you stay compliant and keep valuable data, even if some visitors don’t give permission.
In other words, it lets your website respect your visitors’ cookie choices while still collecting important data for Google Analytics and Ads.
❗️But there’s a major update you need to know:
Shopify will no longer support Google Tag Manager (GTM). You must migrate your tags to the Google & YouTube app to keep your tracking working.
- Shopify Plus merchants: Deadline is August 28, 2025
- Non-Plus merchants: Deadline is August 26, 2026
If you don’t migrate in time, you will lose all conversion tracking on key pages.
Let’s walk through how to use Google Consent Mode with the Complianz app and the new Google & YouTube app setup.
What is Google Consent Mode and Why Do You Need It?
In short, Google Consent Mode is a tool that helps online stores like yours follow privacy laws in Europe and the UK. When visitors come to your site, it lets Google know if they accept or reject cookies for ads or analytics.
This is important because many users choose not to share their data. Without Consent Mode, you might lose important data and ad performance insights. Consent Mode uses smart technology called conversion modeling to estimate some lost data. This can recover conversions lost when users reject cookies.
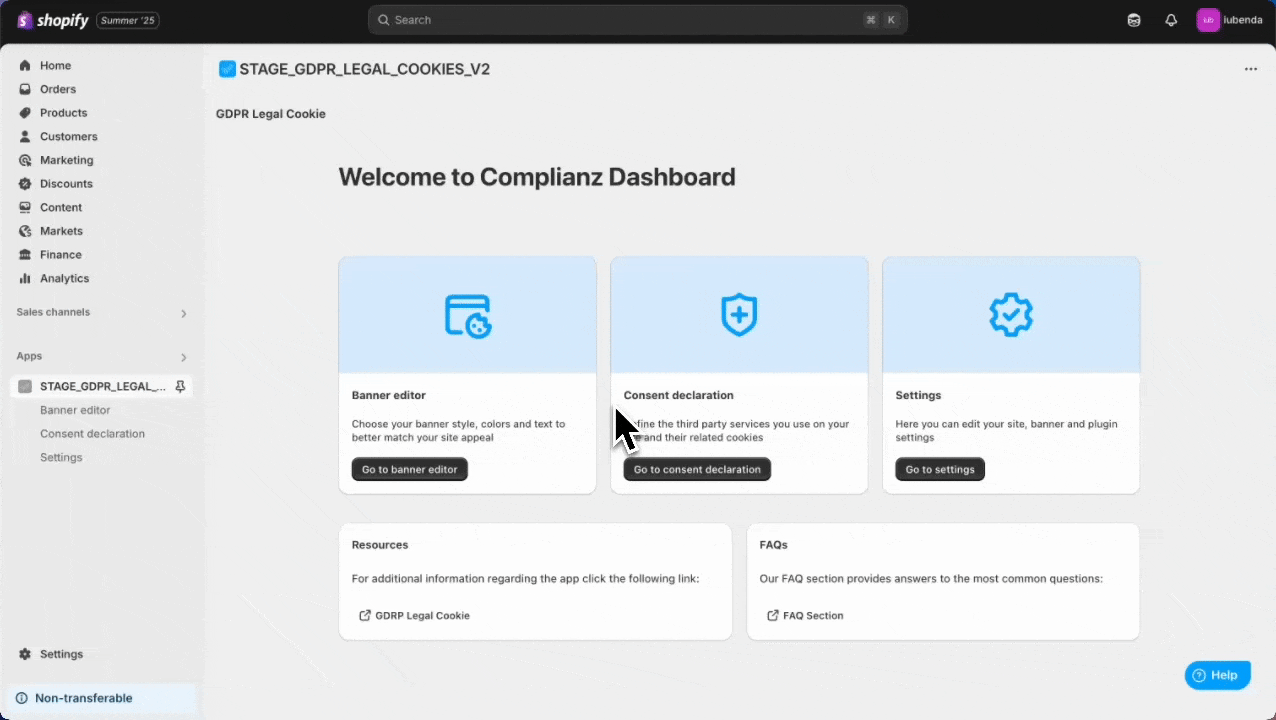
Step 1: Enable Google Consent Mode in the Complianz App
- Log into your Shopify store and open the Complianz app for Shopify.
- Go to the Settings tab inside the app.
- Find the Google Consent Mode section.
- Turn on Google Consent Mode.
Step 2: Use the Google & YouTube App (Required by Shopify)
Shopify has deprecated checkout.liquid, order status scripts, and custom pixels. These no longer work reliably for tracking purchases or conversions. Google Tag Manager is also unsupported on Shopify’s new checkout system.
Why use the Google & YouTube app?
✔️ One simple setup for Google Ads, Analytics, YouTube, and Merchant Center
✔️ Accurate tracking across all pages (including post-checkout)
✔️ Works with Complianz Consent Mode
✔️ Unlocks smart features like Enhanced Conversions & Customer Match
This means, you must now switch to the Google & YouTube app for Google tags.
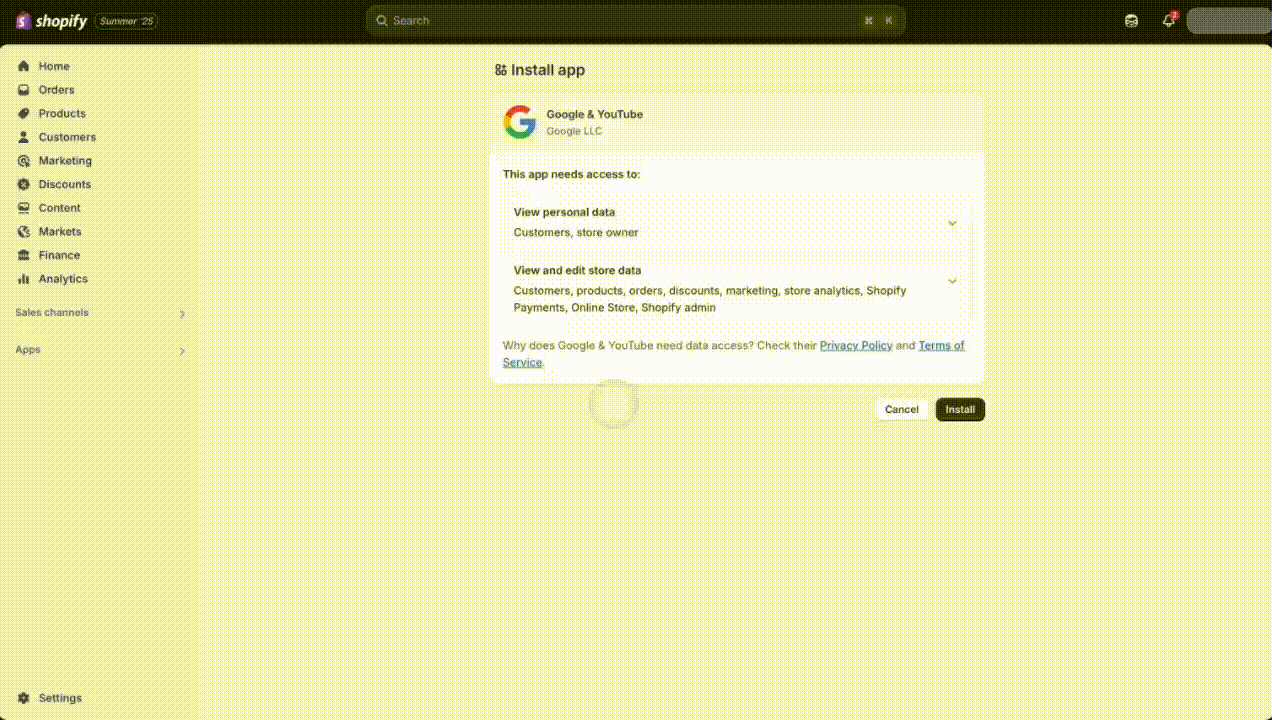
Step 3: Install and Set Up the Google & YouTube App
Install the App
- Go to the Shopify App Store and search for Google & YouTube
- Click Install and follow the prompts
Connect Your Google Account
- Open the app
- Click Connect Google Account
- Sign in with the account that manages your Google Ads, Analytics, or Merchant Center
This app places all your Google tags automatically, works with the new Shopify checkout and Complianz supports it.
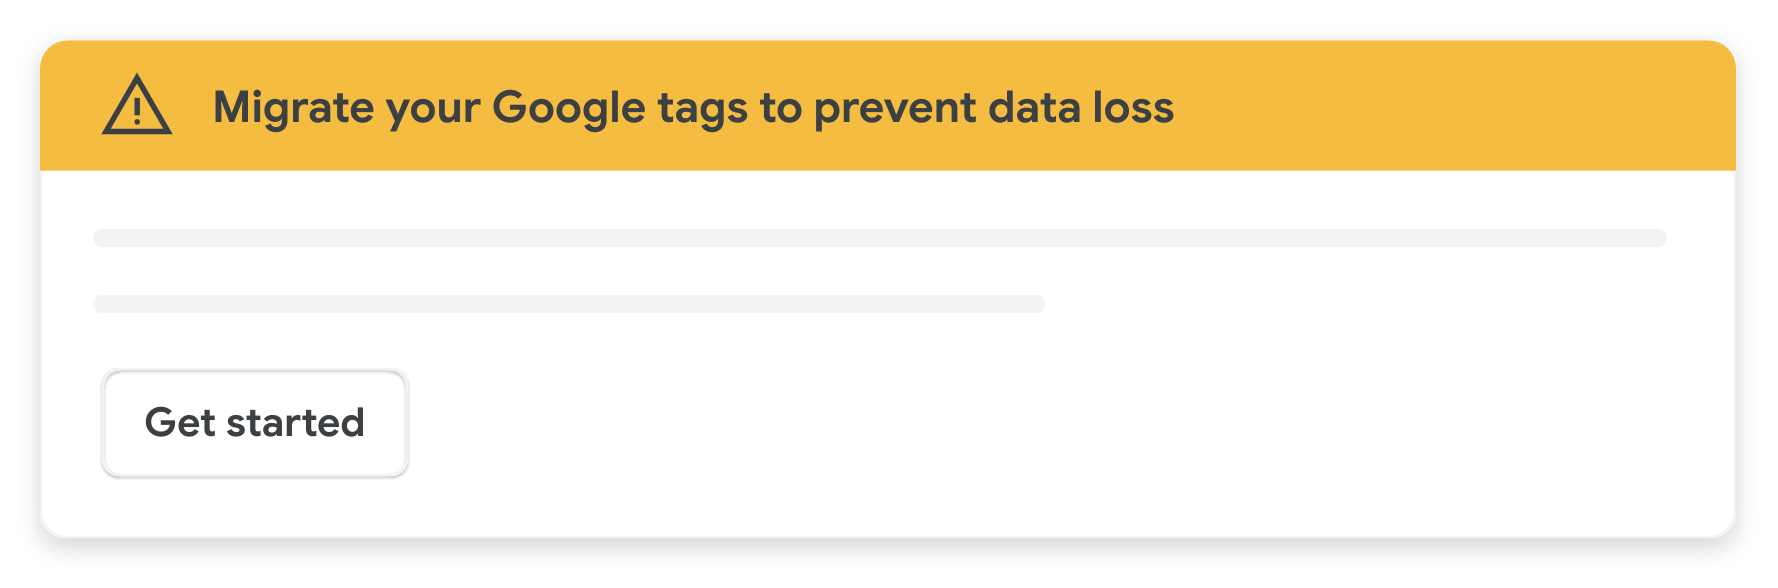
Step 4: Migrate Your Tags
The app will detect any legacy tags currently on your store (from checkout.liquid, order status scripts, or custom pixels).To migrate:
- In the Overview page, click Get Started under the migration banner
- Review the list of Google tags to migrate
- Select tags for:
-
- Google Ads
- Google Analytics
- Merchant Center
- Floodlight
- Click Migrate Selected Tags
After migration:
- A blue banner will confirm your success
- The tags will apply sitewide across all pages
- Events like purchases, cart actions, and pageviews are automatically tracked
- Features like Enhanced Conversions are enabled