When you run a Shopify store, understanding and managing cookies is important. Cookies are small pieces of data your website uses to remember visitor preferences, track user activities, and improve customer experience. But knowing exactly which cookies your store uses and keeping them organized isn’t always easy.
That’s why Complianz for Shopify provides a helpful tool called the Site Scanner. This scanner automatically checks your website, identifies all active cookies, and clearly lists important details about each one—like the cookie’s name, how long it stays active (duration), and its purpose.
In this detailed guide, you’ll learn exactly how to use the Complianz Site Scanner, step-by-step. You’ll also discover how to add and manage cookie information easily.
Let’s get started!
What is the Site Scanner and How Does It Work?
The Complianz Site Scanner is a useful tool that automatically scans your Shopify store to find cookies and tracking services in use. After the scan, it gives you a clear list showing each cookie and the service it belongs to.
This list includes third-party services and their cookies and trackers that you use to collect data. Remember, you should disclose these in your cookie policy to clearly inform visitors about the cookies your site uses.
Keep in mind the Site Scanner is still in beta, this means, it may occasionally detect cookies or services that aren’t actually on your site. For this reason, so we recommend to carefully review the scan results each time to make sure they are correct.
Regularly running the scanner and updating your cookie list helps keep your store compliant with privacy regulations.
How to Use the Complianz Site Scanner
Step 1: Getting Started (Onboarding)
- After installing Complianz from Shopify’s App Store, you’ll see a welcome screen.
- Click “Get started”. This opens the onboarding wizard.
- Follow the easy prompts to tell Complianz about your store:
-
- Select your business location.
- Choose your target regions or countries. This helps Complianz understand privacy rules that apply to you.
- After answering these quick questions, click “Confirm and go to dashboard”. And now you will then see the Complianz dashboard.
Step 2: Using the Site Scanner Automatically
By default, Complianz will scan your Shopify store automatically to detect all the cookies and trackers running on your site. This saves you time and helps create an accurate cookie list without manual work.
What Happens During the Scan?
The scanner visits your website pages, identifies cookies, records their details (like name and duration), and adds them to your cookie policy.
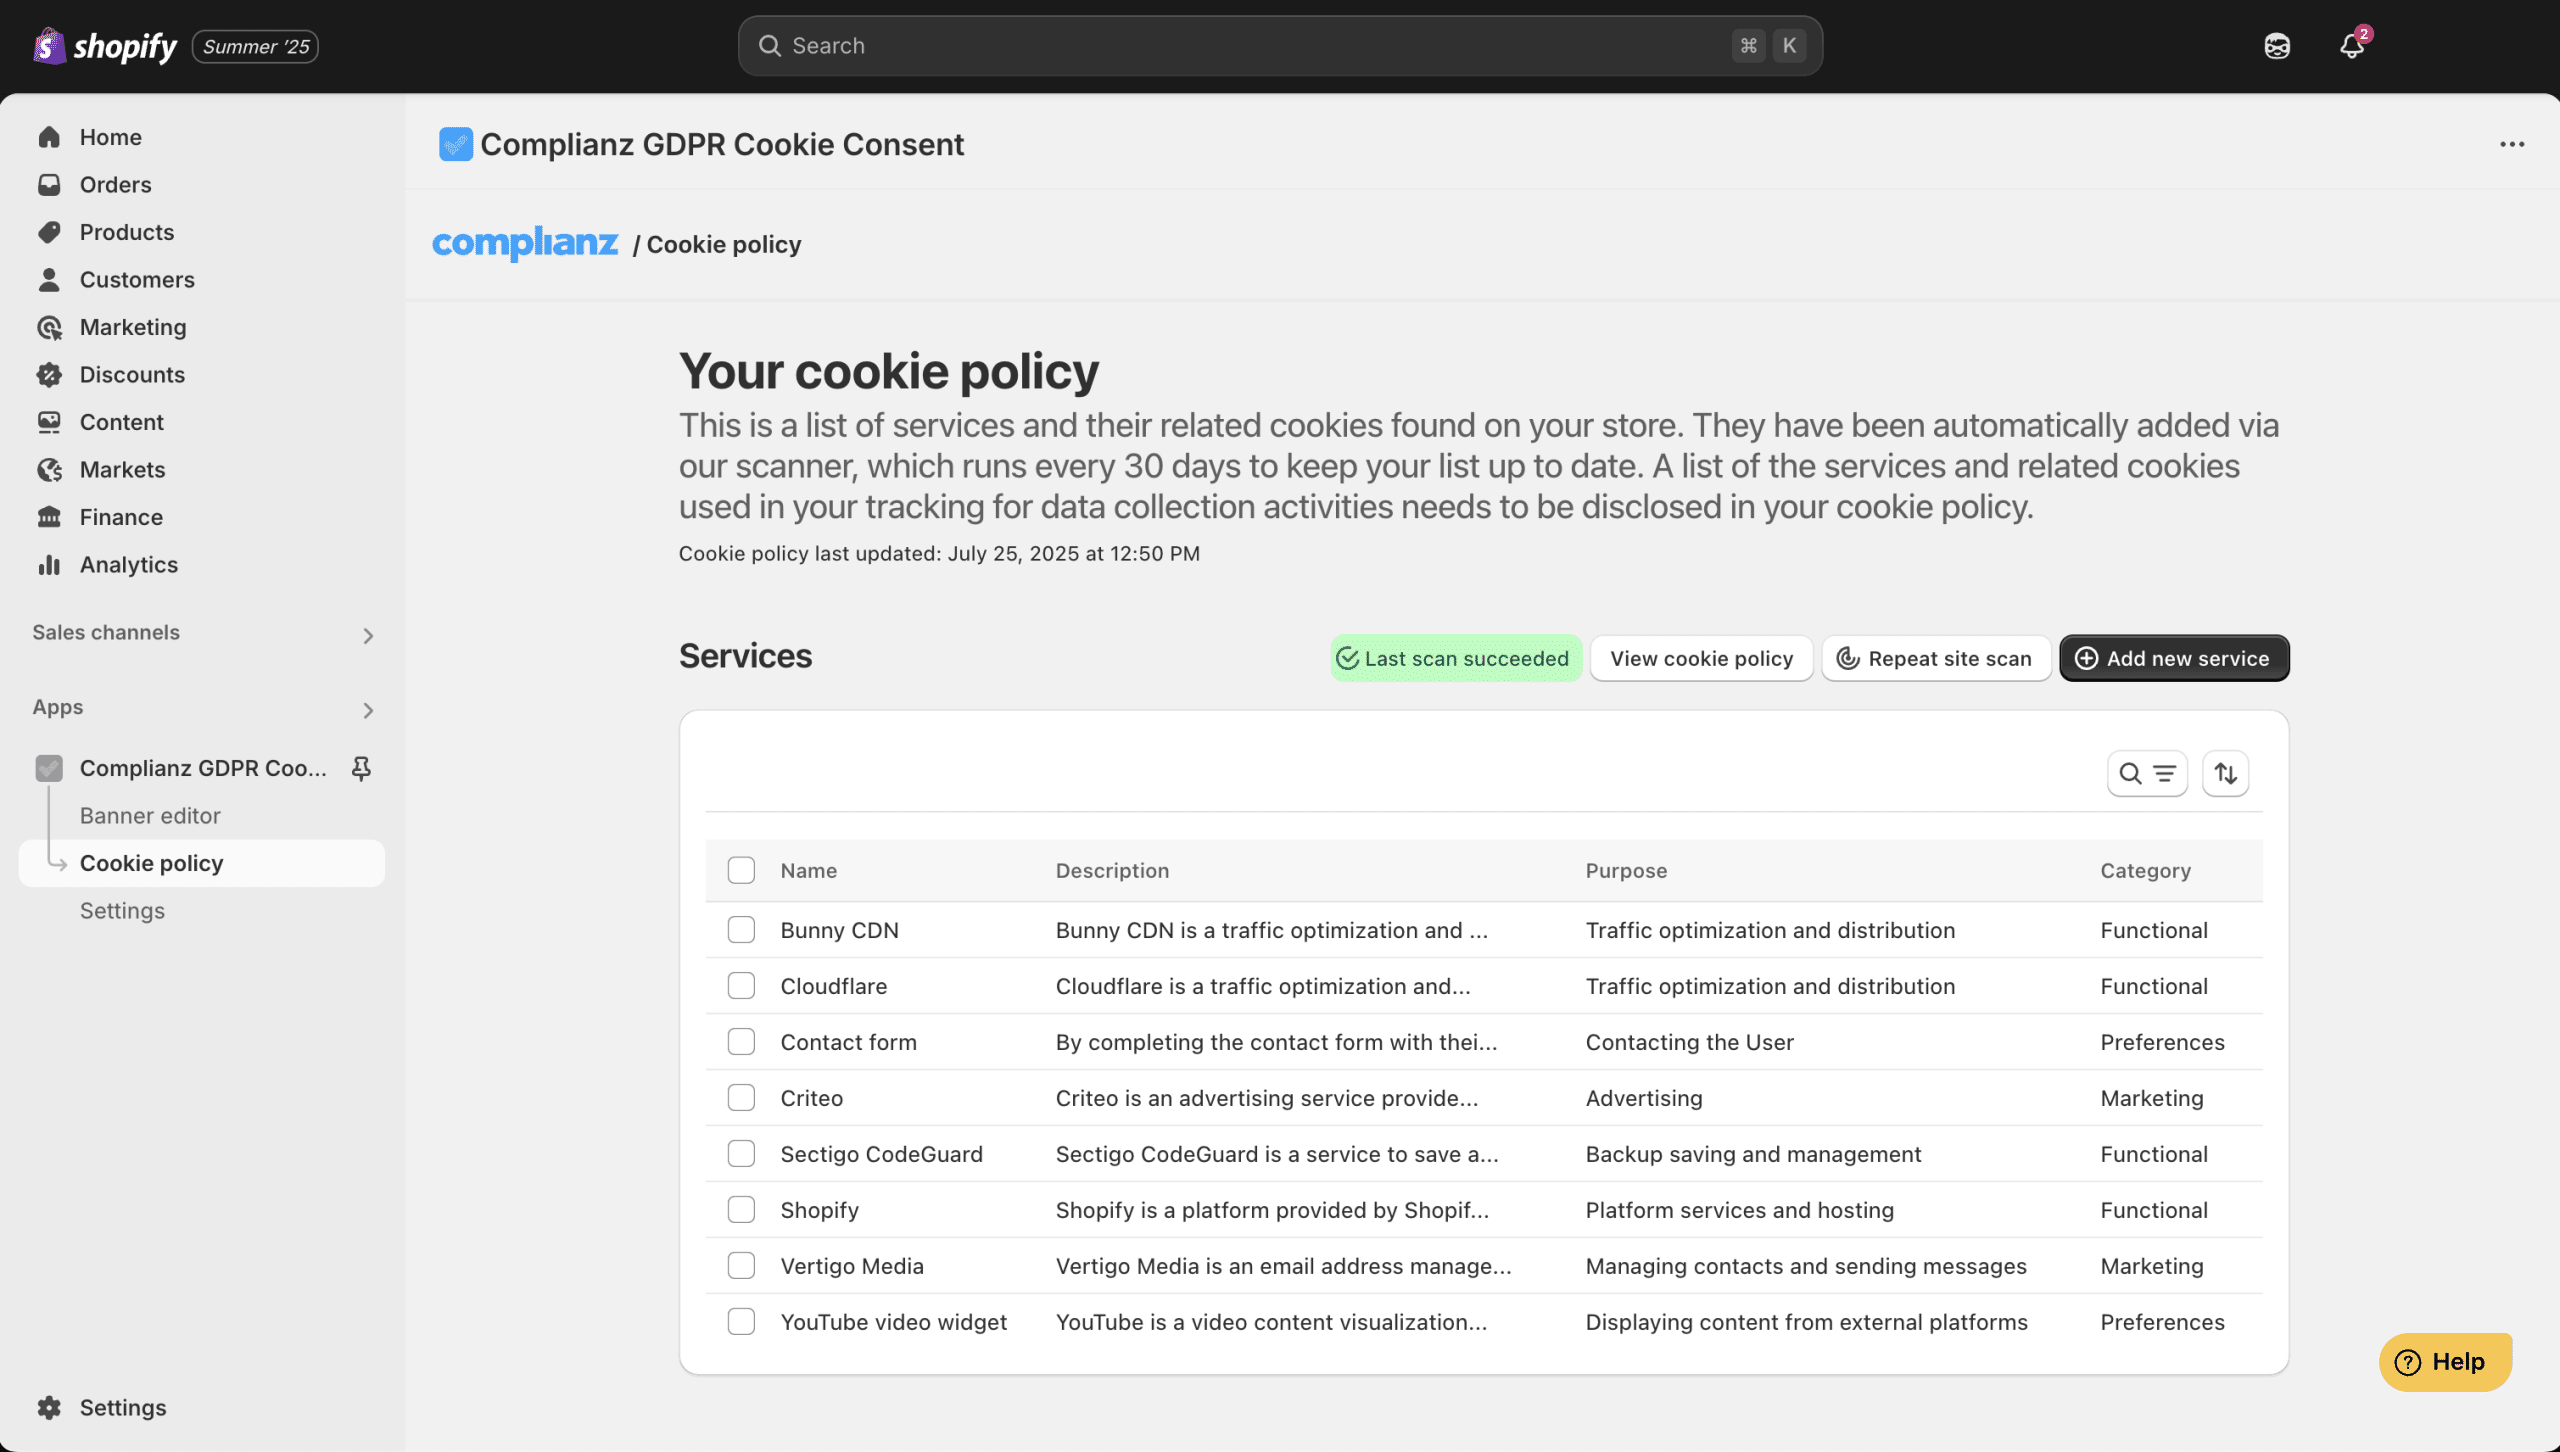
✅ If the Scan Is Successful:
You’ll see a summary of detected cookies in your dashboard. You can then review or add any cookies manually if needed.
⚠️ If the Scan Can’t Complete:
Sometimes the scanner may not be able to access your site. In this case, you will see an alert like this:
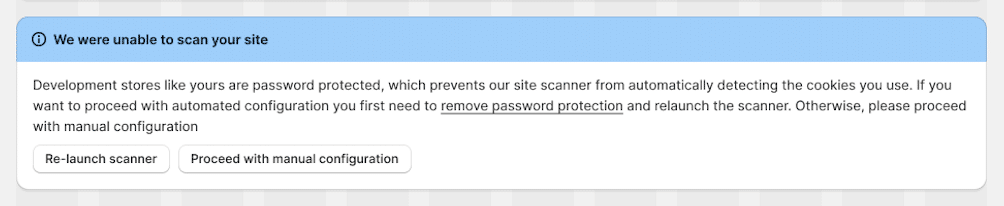
This message means the scanner couldn’t reach your website to find cookies. Don’t worry—there are two options to move forward:
- Re-launch the Scanner
If possible, temporarily remove any restrictions like password protection from your Shopify store and then click “Re-launch scanner”. This allows the scanner to run again and detect cookies automatically. - Proceed with Manual Configuration
If you prefer not to remove restrictions or if the scan still doesn’t work, click “Proceed with manual configuration” to add cookies and services yourself. Simply continue with the step 3 below.
Step 3: Manually Adding Cookies and Services
Whether you chose “Proceed with manual configuration” because the automatic scanner couldn’t run, or you want to add cookies manually after a scan, this is how you manage your cookies and services in Complianz.
To manually set your cookies and third-party services:
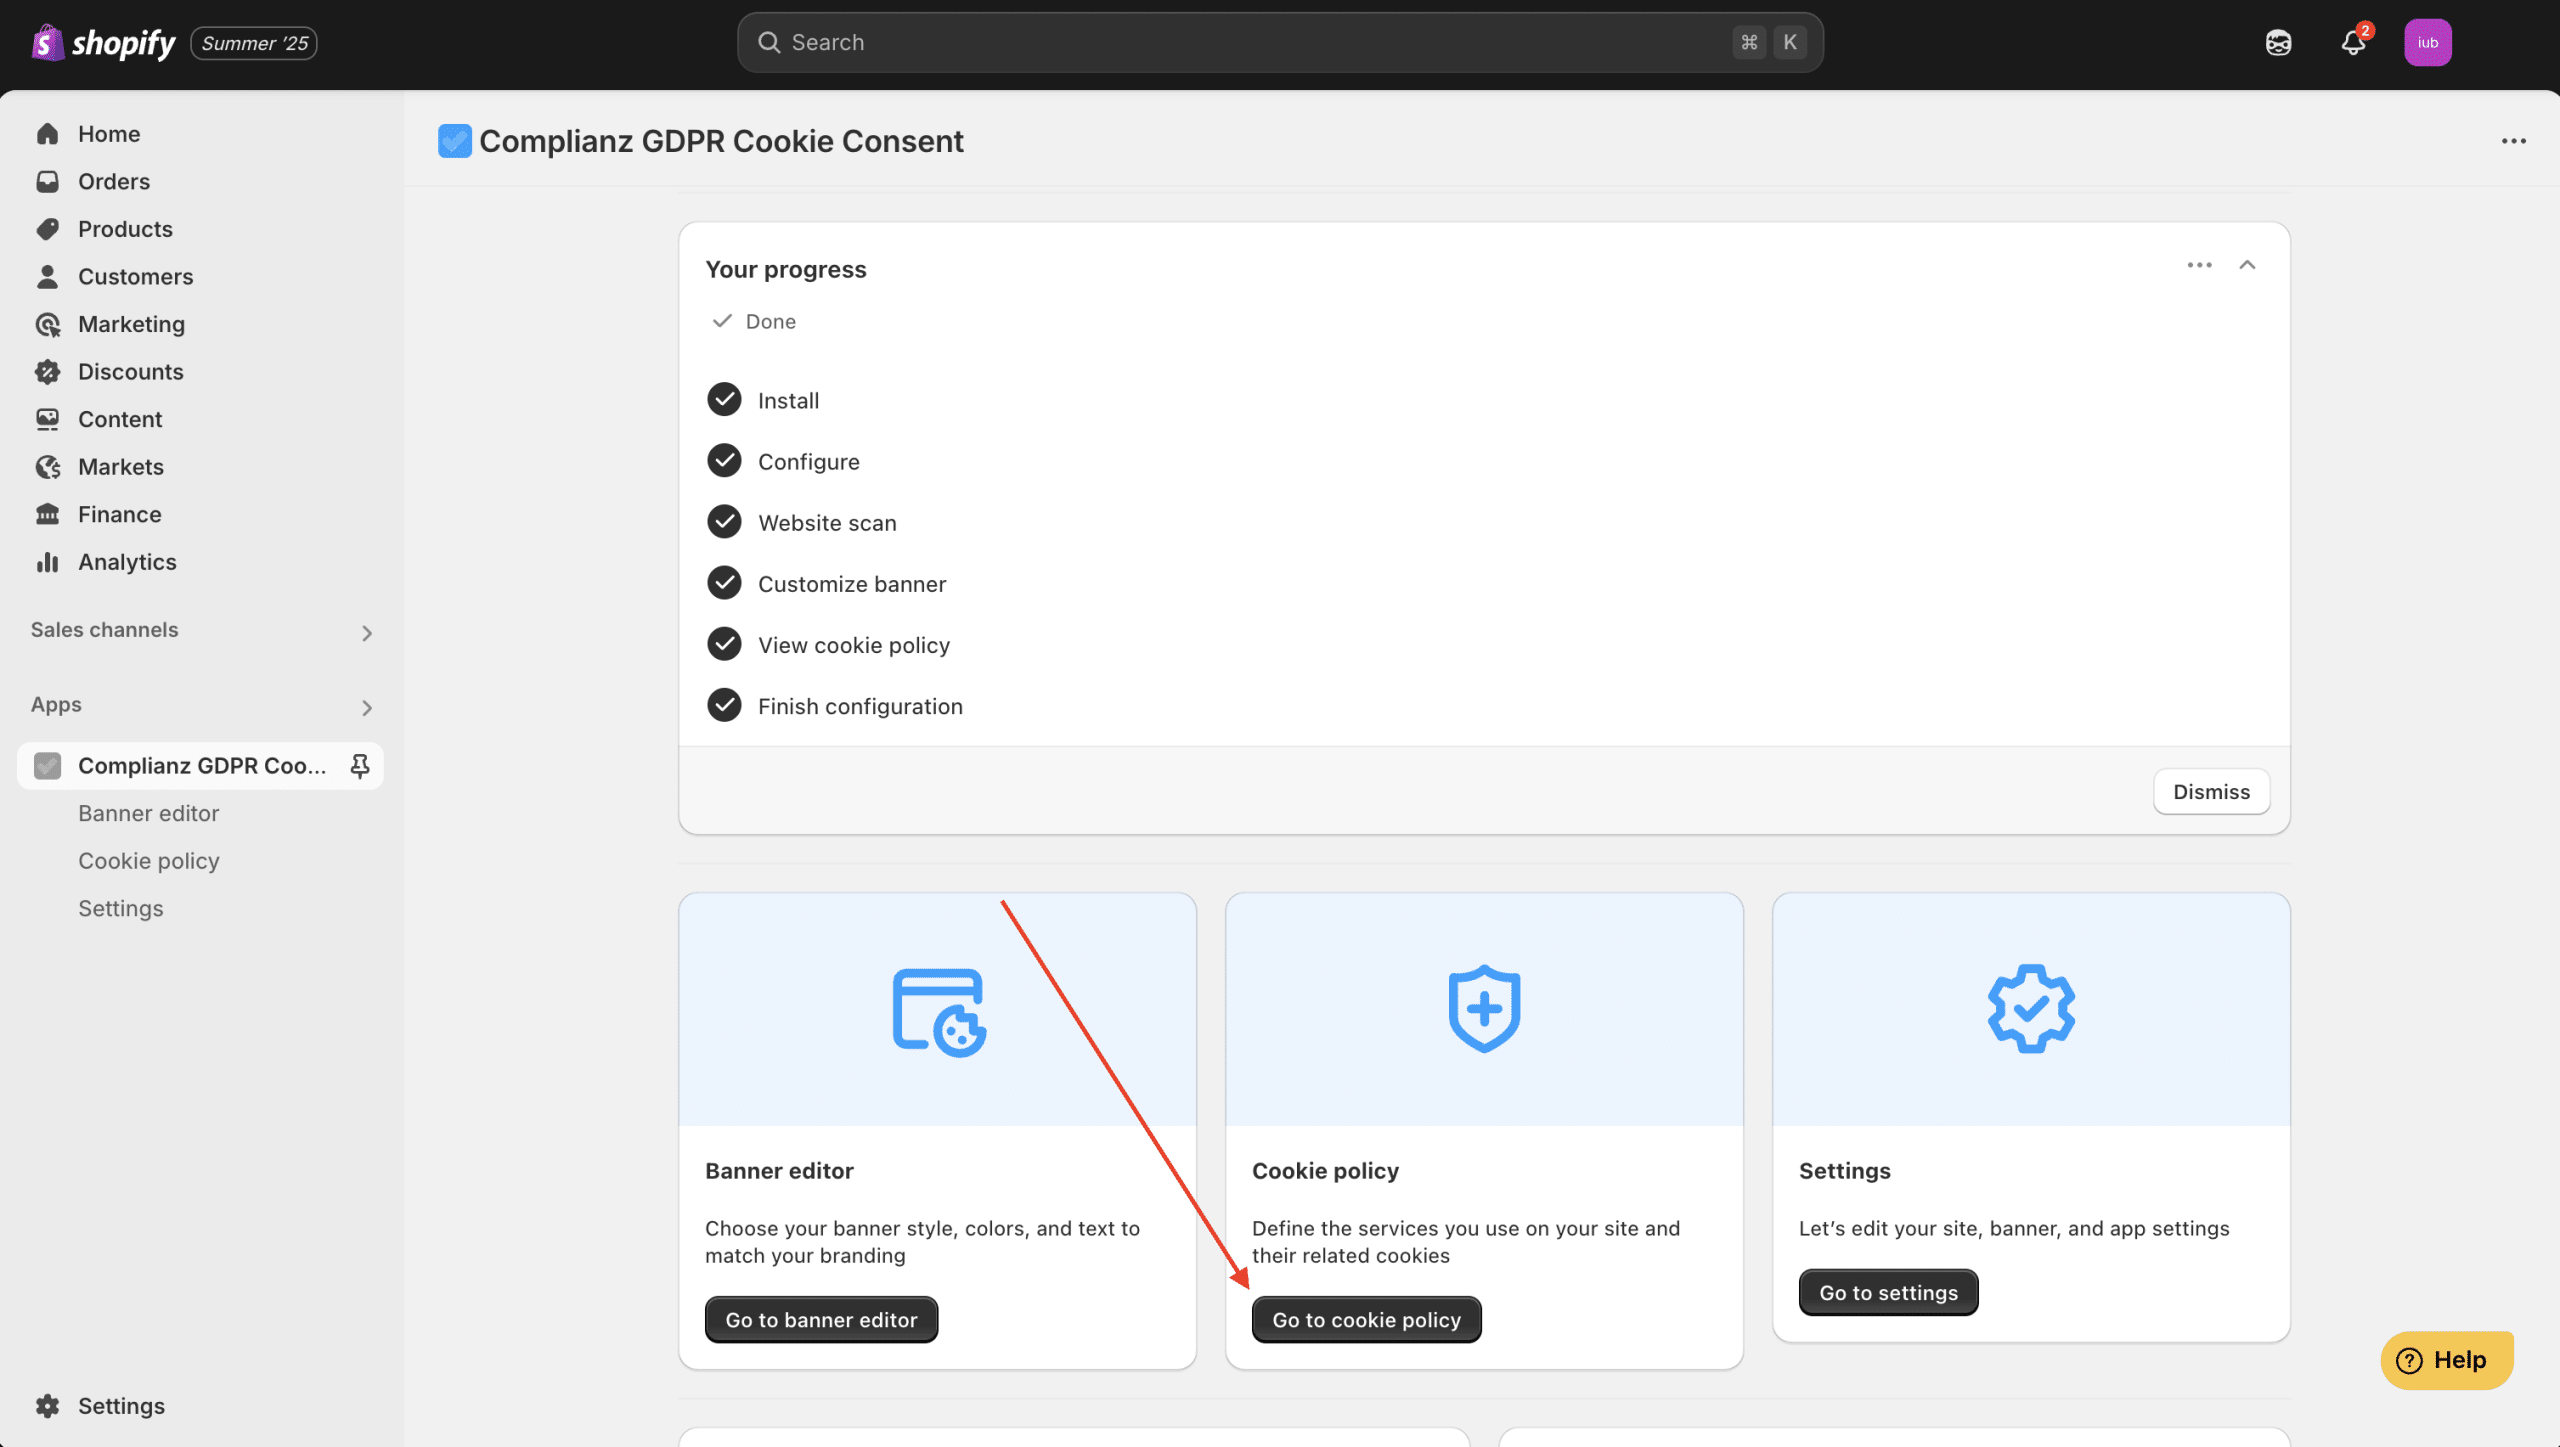
Access the Cookie Policy
From your Complianz dashboard, click “Go to cookie policy”
This section shows all the third-party services and cookies that Complianz has detected or that you have added manually.
Adding New Cookies and Services Manually
If you want to add a cookie or service that the scanner missed or if you started with manual configuration:
- Click the “Add new” button at the top right corner.
- Use the search bar to find the service or cookie you want to add.
- Check the box next to each relevant service or cookie.
- Click “Save” to add them to your cookie policy.
This lets you keep your cookie list complete and up-to-date even if the scanner misses something.
💡 Keep in mind that custom services that are not in the Complianz database cannot be added via Wizard. You can only select from the services already listed in the Complianz database, which can be easily accessed from the cookie policy page.
If you use a service that isn’t included in our database, you can manually pre-block it. However, please note that while this will prevent the cookie from being set before user consent is obtained, it won’t automatically include that cookie or service in your cookie policy.
You can still add it manually to your HTML cookie policy if needed. For guidance on how to view and copy your cookie policy HTML, please refer to this guide.
To learn more about how to properly prior-block cookies or services, please refer to our detailed guide: Prior Blocking of Cookies: A Complete Guide to Manual Tagging with Complianz for Shopify.
Step 4: Using Whitelist and Blocklist
The Cookie Policy menu now includes two extra options: Whitelist and Blocklist. These give you more control over which domains run cookies on your store.
Whitelist
Use the Whitelist for trusted domains that should never be blocked. Whitelisted domains always load — even before a visitor gives consent.
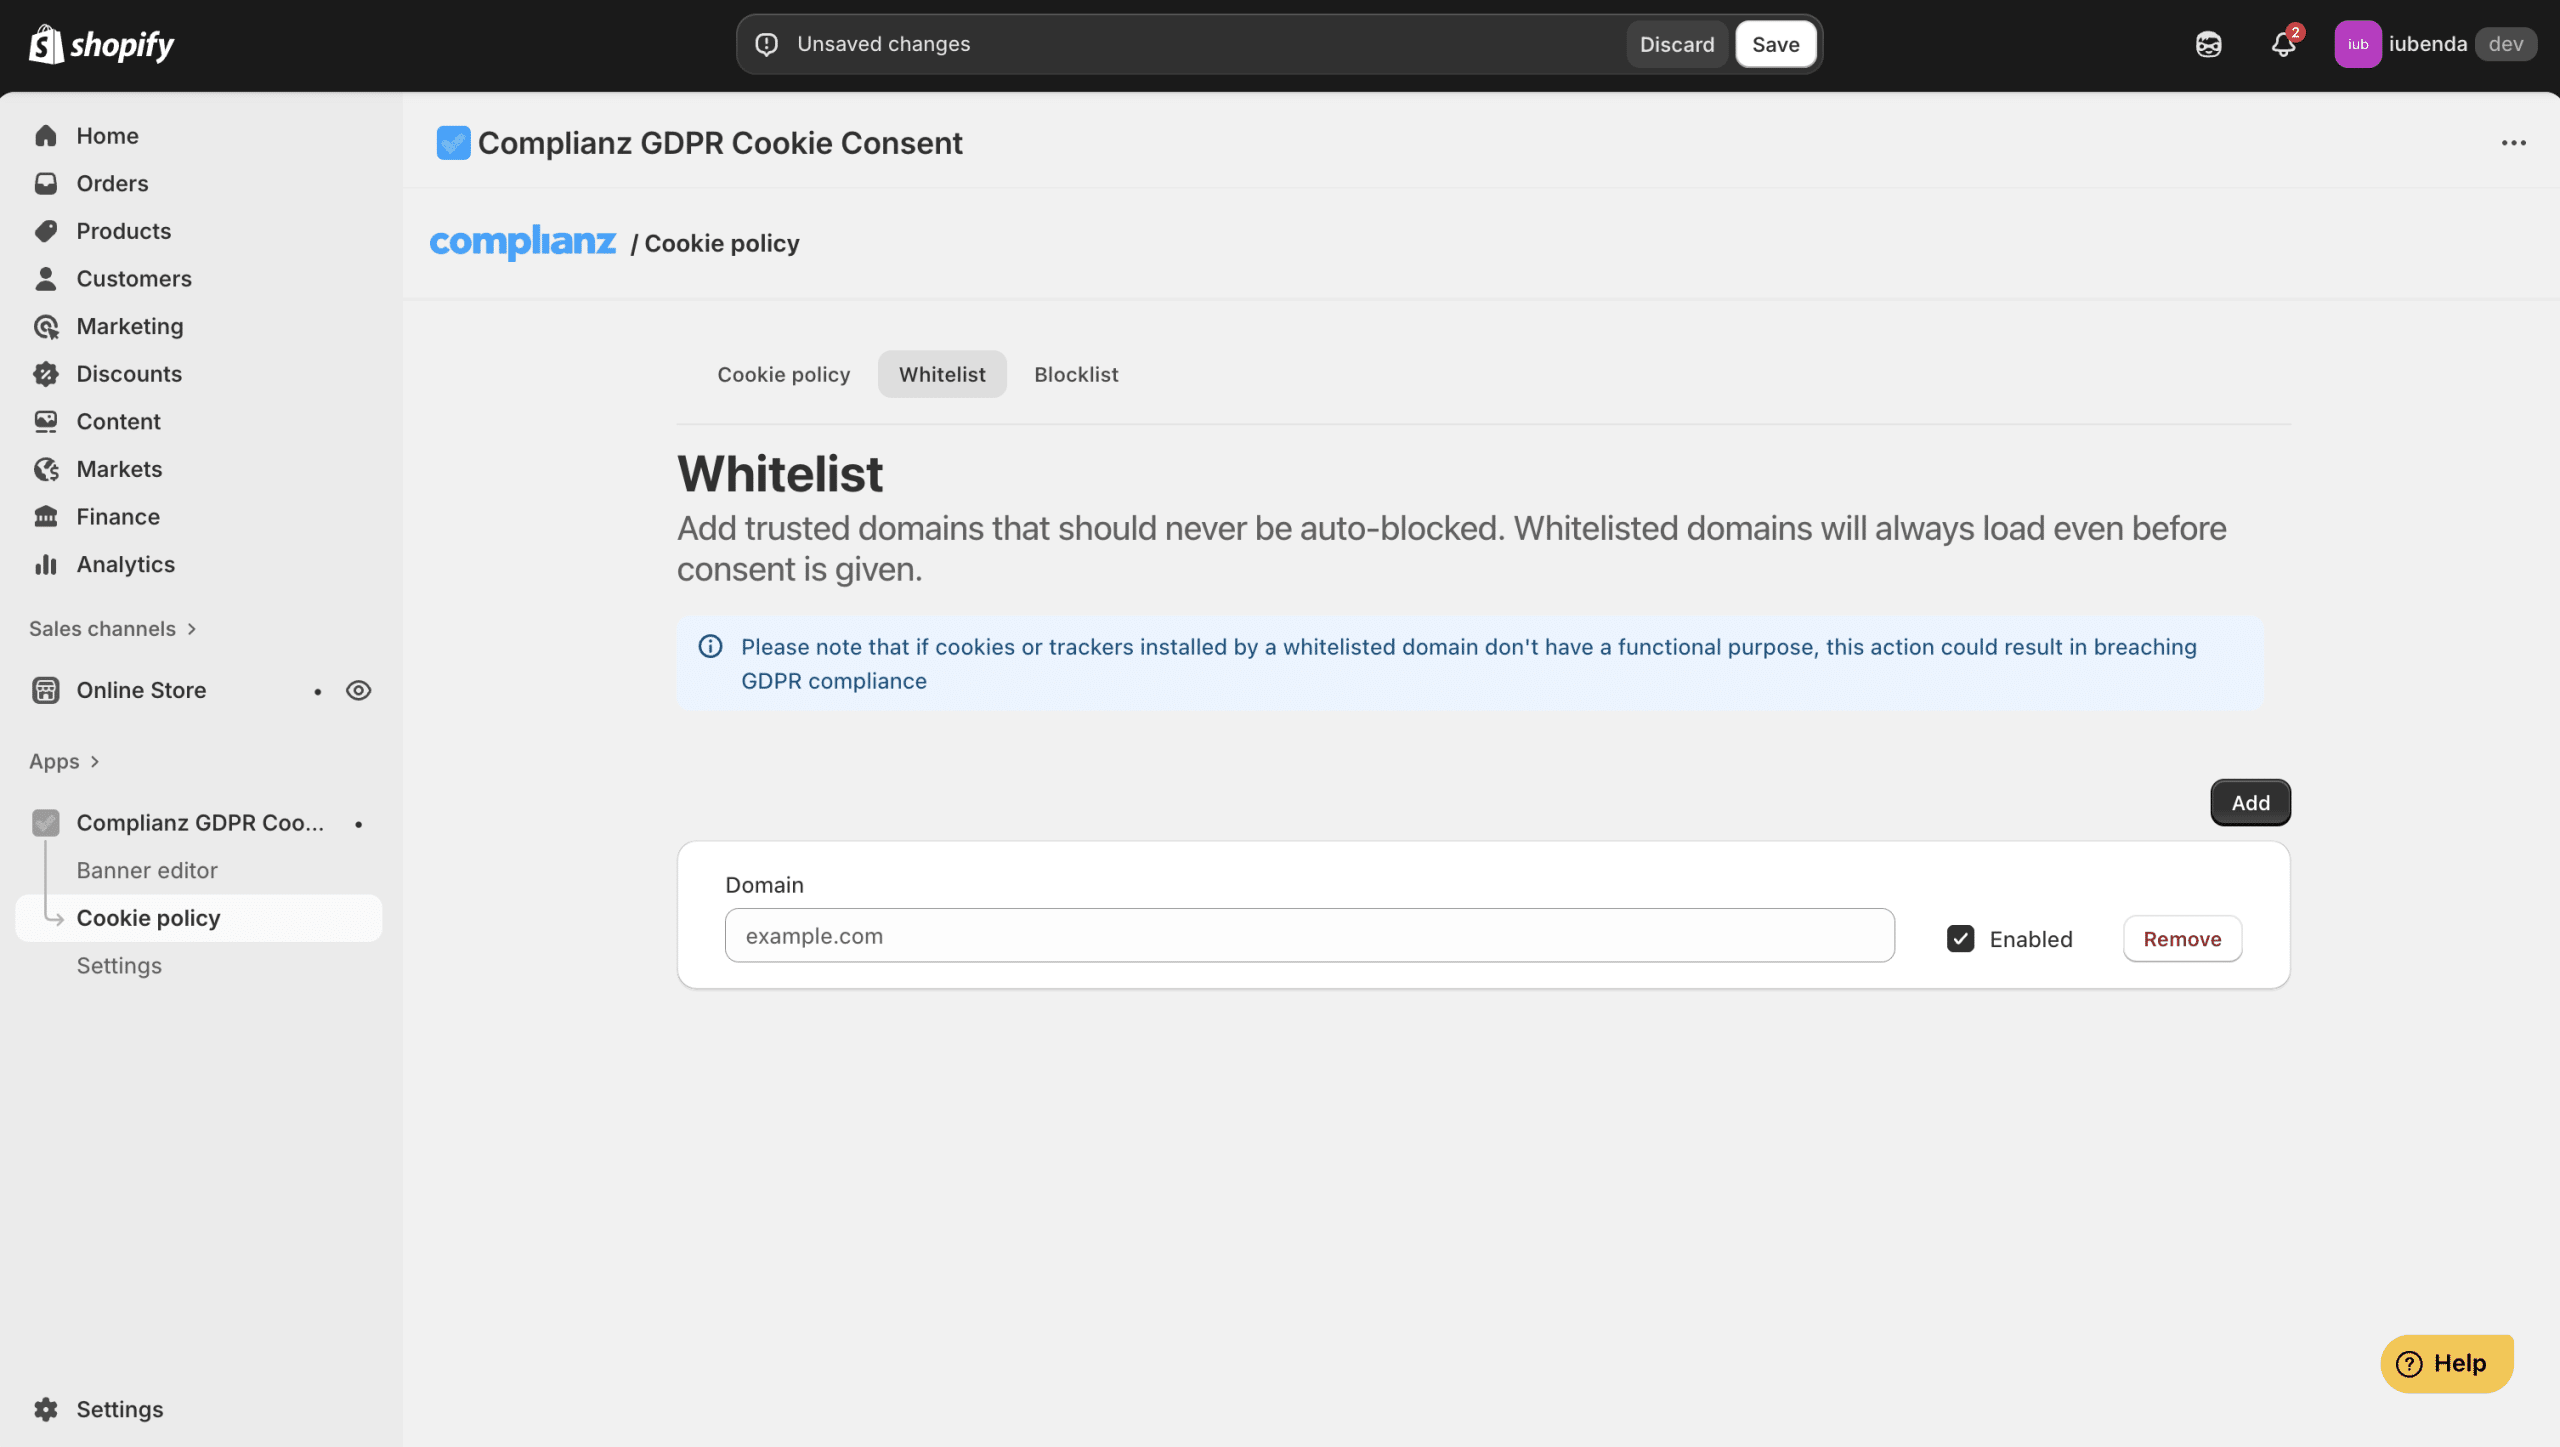
How to whitelist a domain:
- Go to Cookie Policy > Whitelist > Click Add
- Enter the domain (for example:
example.com). - Then click Save.
⚠️ Important: Only whitelist domains that set functional cookies (like cart or login cookies). If you whitelist other cookies, you may break GDPR compliance.
🔎 Example: Whitelisting Klaviyo
Many Shopify stores use Klaviyo for email marketing and tracking. Without whitelisting, some Klaviyo scripts may be blocked, which can break forms and subscriber sign-ups.
To whitelist Klaviyo:
- Go to Cookie Policy > Whitelist.
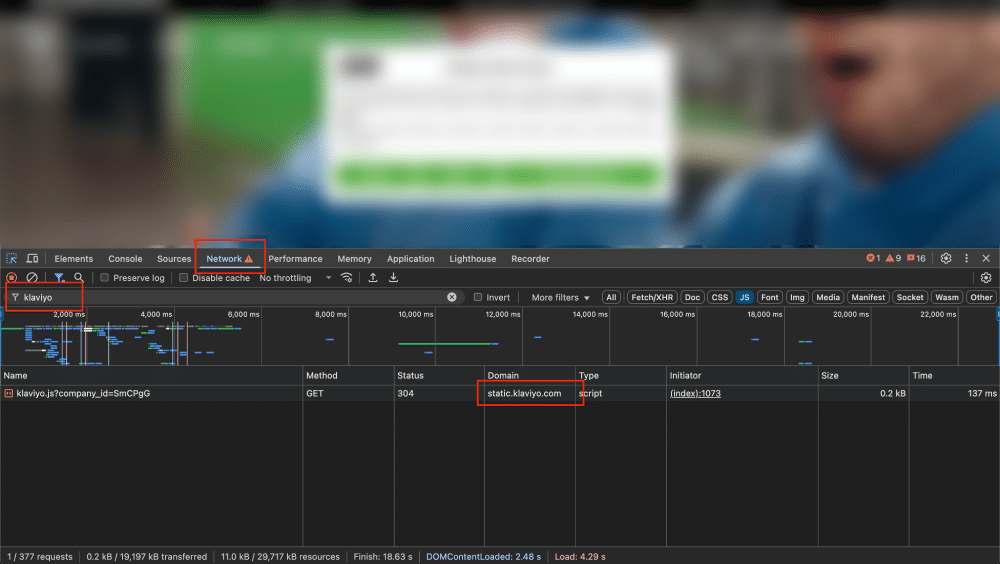
- Find the Klaviyo domain to whitelist:
- Open your store in a browser (for example, Chrome).
- Right-click anywhere on the page and choose Inspect.
- Go to the Network tab.
- Refresh the page.
- In the search bar, type klaviyo.
- You’ll see requests like
static.klaviyo.com. These are the domains Klaviyo uses.
- Click Add.
- Enter the domains into the Whitelist (for example:
static.klaviyo.com). - Then, click Save.
💡 Tip: The most common domain for Klaviyo is static.klaviyo.com, but depending on your setup, you may also see others. Always whitelist the domains you actually find running on your store.
Blocklist
The Blocklist lets you block specific domains by default. Their cookies run only if a visitor gives consent for the purpose you set.
How to blocklist a domain:
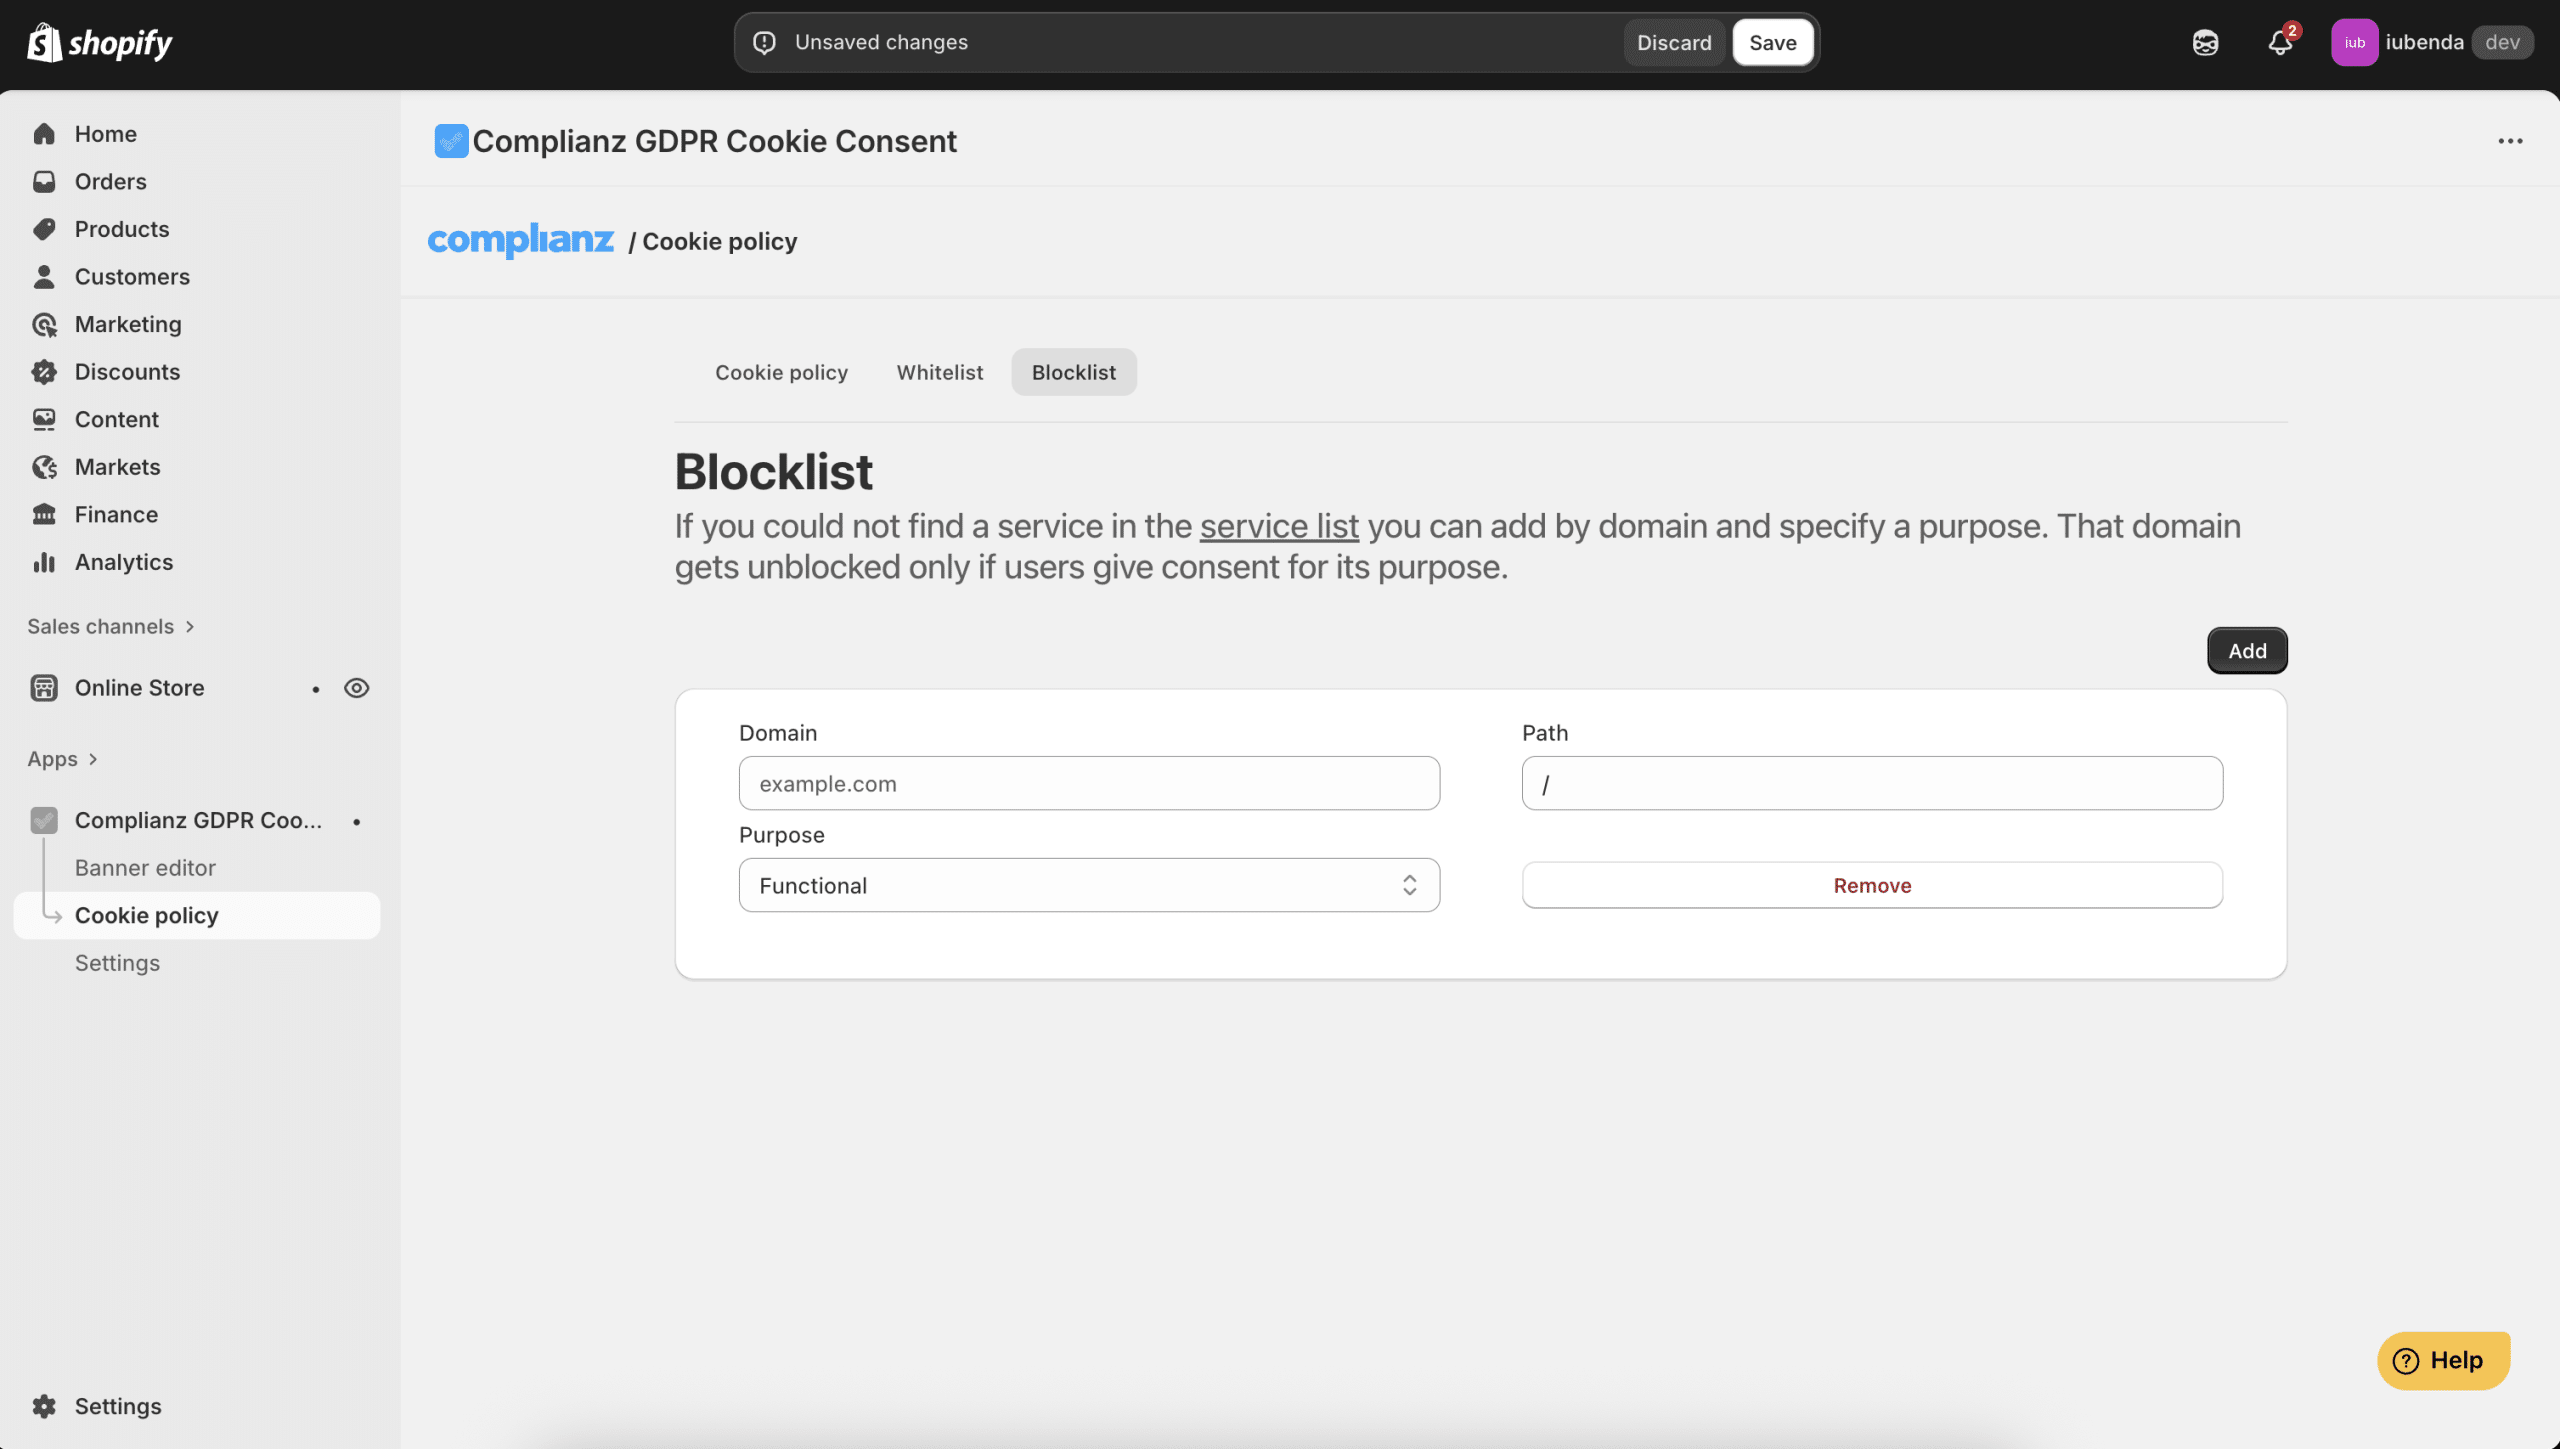
- Go to Cookie Policy > Blocklist.
- Enter the Domain (for example:
example.com). - Add the Path (for example:
/maps). - Select the Purpose for this domain. You can choose from:
- Functional: Required for your store to work properly (for example, login or shopping cart cookies).
- Preferences: Used to remember visitor choices, such as language or region.
- Analytics: Collects data about how visitors use your site (for example, traffic statistics).
- Marketing: Tracks visitors for advertising, remarketing, or social media purposes.
- Then, click Save.
💡 Tip: Use the blocklist when a service is not in the Complianz service list but you still want to control it.
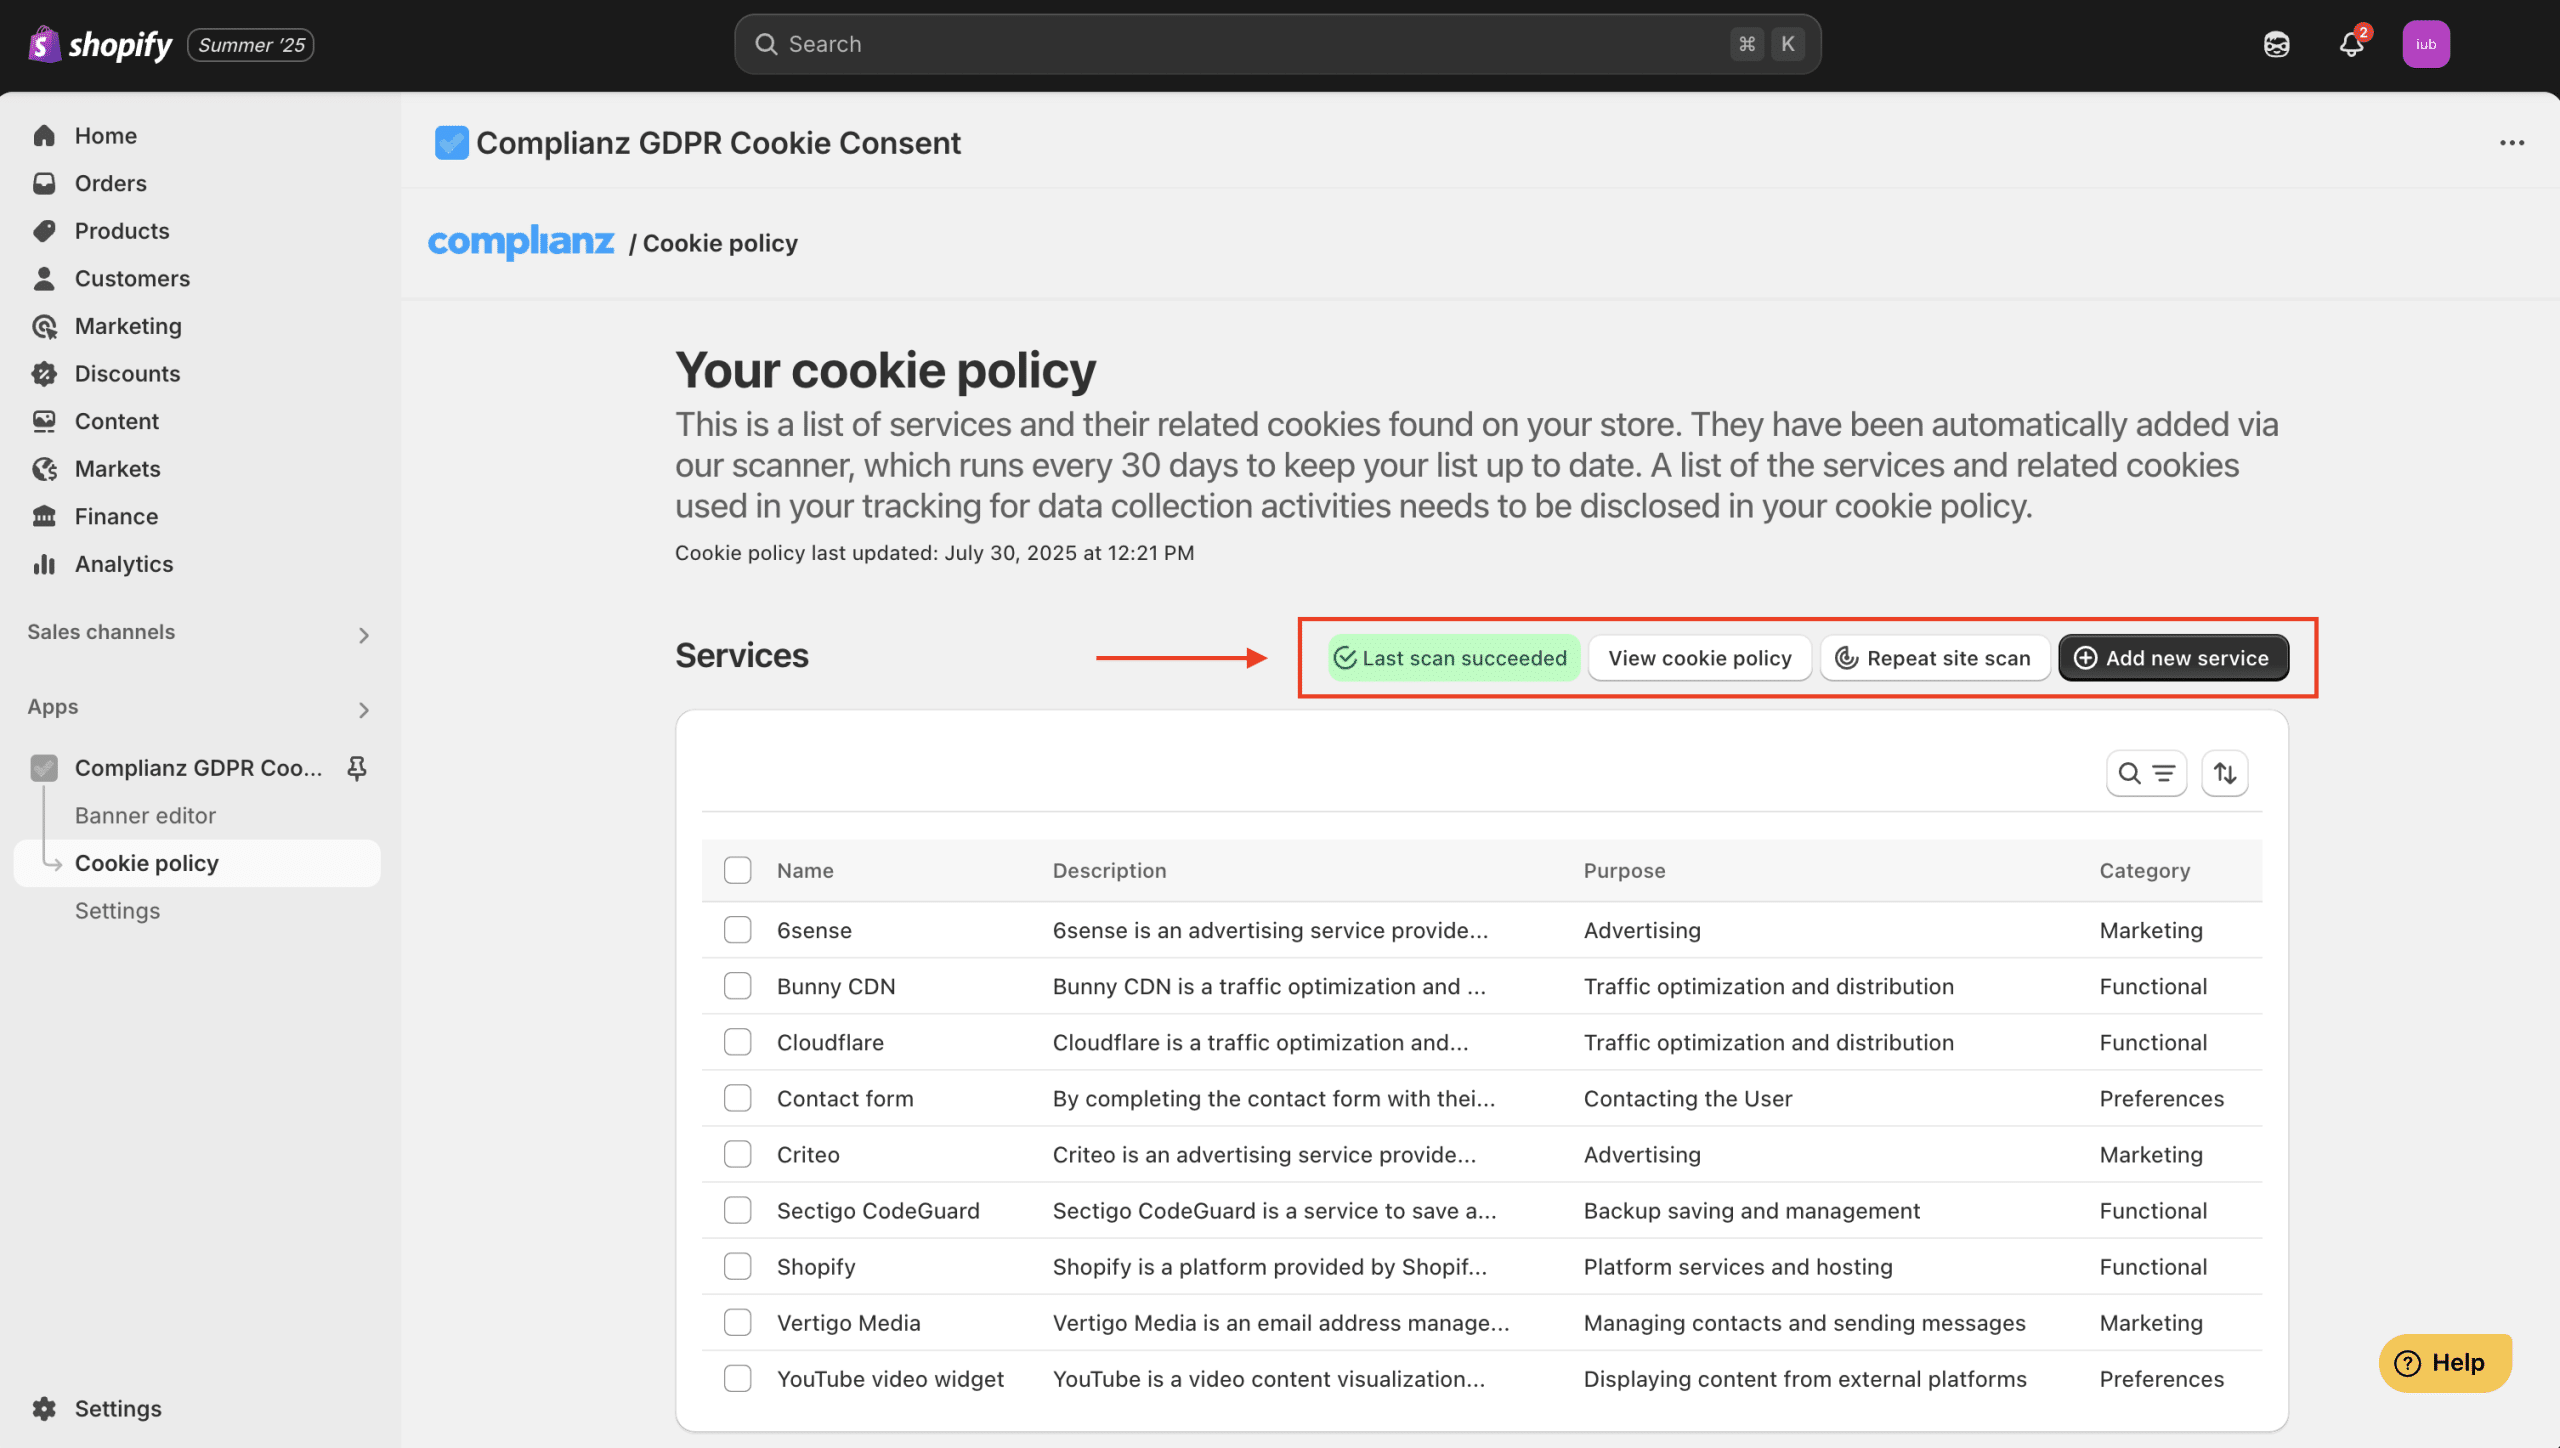
Step 5: Managing Your Cookie List and Policy
From the cookie policy page, you can also:
- Repeat Site Scan: Click the button to scan your site again at any time.
- View your cookie policy: Use the auto generated cookie policies in each language to make your own policy pages for your shop.
Important Notes for Using the Site Scanner
- Always update your cookie list regularly.
- Run a new scan whenever you add new apps or services to your Shopify store.
- Your cookie policy must reflect the actual cookies you use to stay compliant.
Stay safe, stay compliant, and manage your cookies easily with Complianz!